Showing posts with label park bench. Show all posts

Saturday, June 28, 2014

Workin' on that Curb Appeal: An Inexpensive solution!

Well, well, well....yeah, it's been almost a month since my last post.  I wanted to take a break from any home improvement projects just to enjoy and appreciate all the work that I've already put into my home.  While I was sitting on my porch a few days ago, enjoying my sweet tea, I looked and realized that the mismatched pots around me were just so blah and the front of my house needed a little sprucing up!

Here's are some BEFORE shots of the front porch area:


One of the biggest "problems" for me were the mismatched pots.  I inherited the pots with dead plants  from the previous owners of the house who just left them on the porch after they moved out.  Umm...thank you? Since moving into my home, my parents (who love anything gardening related) helped me plant an indoor snake plant in one pot and some annuals in the other.  With the recent addition of my yellow park bench, my porch was looking a little more colorful than when I moved in, but it didn't feel cohesive or bright.

The fastest and most inexpensive solution was for me to spray paint my pots!

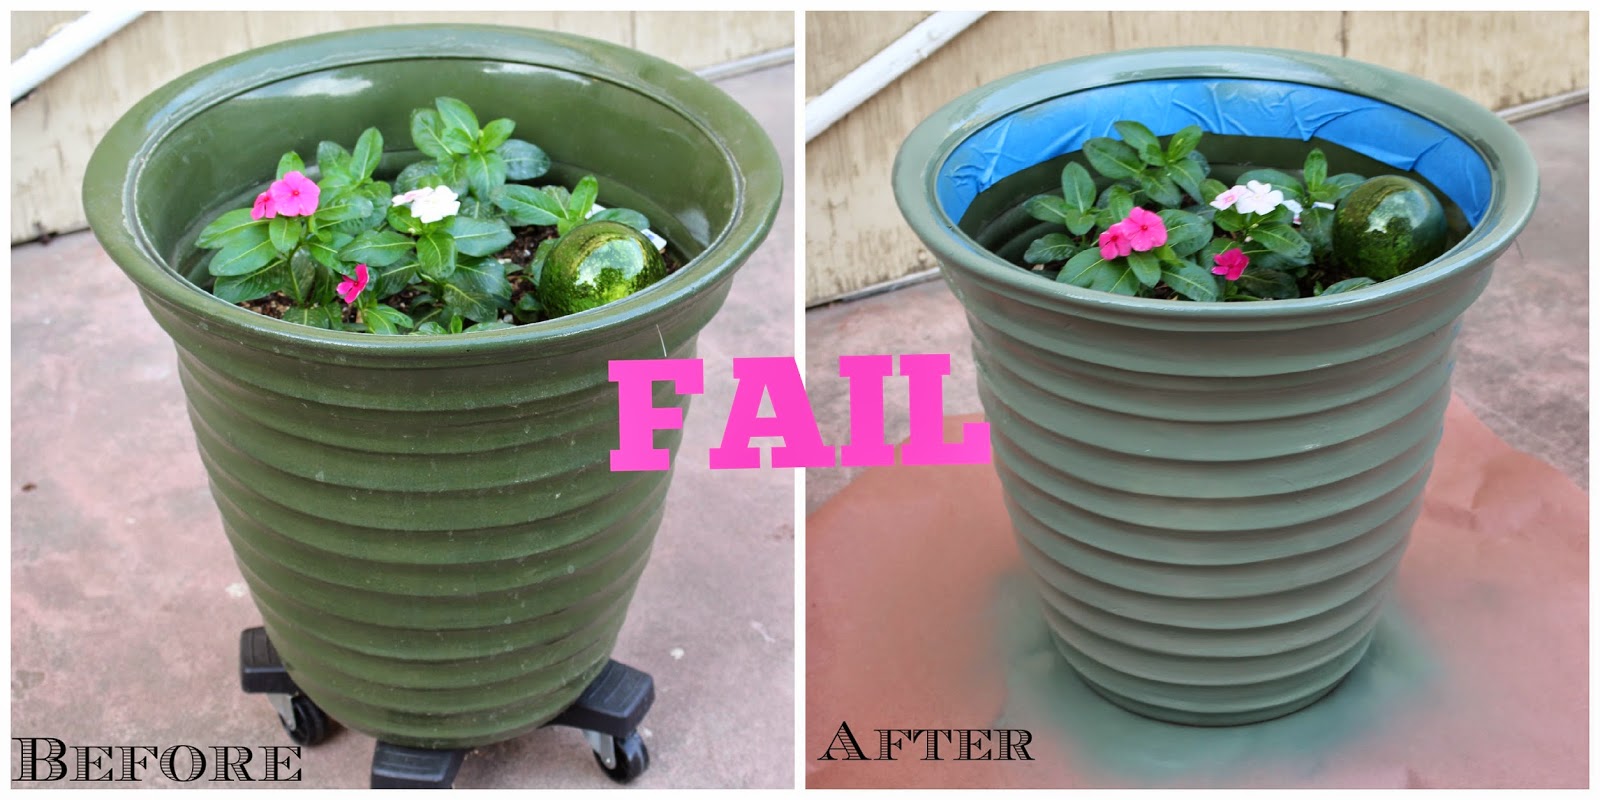
In my 1st attempt, I picked up a can of green spray paint I found in my garage and started spraying the pots.  However, the color choice was a total FAIL!  I went from a dark green pot to a dull green pot...womp, womp.

So, I told myself to "go bold or go home"! Actually, in this case it would be go bold or stay inside!  (Because I'm already home..get it? get it?)  I went to my local hardware store and picked up some spray paint by Rust-o-leum in Seaside (gloss).

Here's my 2nd attempt in progress:

BOLD right?!

Here's what the porch looks like with the bright pots now:


The porch is brighter and the colors are a lot more cohesive.  The bright blue pots also go well with my light blue door!  I love the impact that the painted pots have on my porch.

I definitely want to continue sprucing up the front of my house.  I was thinking about adding a couple of hanging plants, repainting the concrete, and painting the security door?  I know security doors are so yuck, but they are a necessity in the town I live in (sad, I know).


I hope you like the before and after.  Let me know how you've spruced up the front of your house!
[Share to Pinterest]

Monday, May 26, 2014

Park Bench Makeover: Before & After

I finally finished making over the park bench that was gifted to me by my friend, Melissa.  If you missed my post about prepping a bench for a makeover, go ahead and read about it here.

 Behr Honey Bird (Semi-Gloss) & Rustoleum Soft Iron (Flat)
I painted the park bench a bright yellow and I love how bright and happy the bench looks sitting on my porch.  I was torn between a bright yellow or a watermelon red, but bright yellow won.  I picked yellow because I often see red outdoor furniture on my neighbors' porches and I wanted something that equally stood out, but was slightly different.


The only recommendation I have for painting a park bench (in addition to prepping the piece) is remember to prime the wood before painting it.  This is the one and only time that I've skipped primer and I ended up painting seven (yes, as in 7!!!!) coats to entirely cover the natural wood color underneath.  Otherwise, painting the wood slats was very straightforward and re-assembling my bench alone was a breeze.  I also used used Minwax polycrylic over all the wood slats.

Here's a before and after shot:


Can you believe the difference?

Linked to:  http://diyshowoff.com/category/other/that-diy-party/
[Share to Pinterest]

Friday, May 9, 2014

How to Prep an Old Bench for a Makeover


My thoughtful friend Melissa gave me 1 of the 2 Berkley Forge and Foundry benches she had sitting in her backyard.  The bench needed a makeover and I knew I was going to have to sand and paint, but my search through the world wide web didn't exactly show me how to dismantle my bench...so I'm here to show you what I did!  You know, in case you come across an old bench too?

As you can see in the pictures above and below, the bench still has a good shape to it and it felt sturdy when I sat on it.  The wood stain or varnish (if there was any) has long been worn away and there is a lot of water damage on EVERY wood slat.
Notice the discoloration on the seat area of the bench!


I started by removing any cobwebs or obvious dirt from the bench the best I could with a clean napkin.


The nuts on the back of the bench were covered by a cap so I popped those off with a flat-head screw driver.


I made sure to keep all the screws, nuts, and bolts in a zip lock baggy.  I'll be taking the bag to my local hardware store to find replacements for the ones that are rusty.

Once all the nuts were exposed I loosened each one and removed the slats one at a time.  I made sure to the label the slats in numerical order from top to bottom on the same side of each slat so that I would know where they would go once I put my bench back together.


I labeled my wooden slats on the sides so that I can paint the front an back without having to worry about covering up any numbers!
After the slats were wiped down one more time, I sanded both sides with 60 grit and then 120 grit sand paper.


These babies are now ready for paint!

As for the sides of the benches, I hosed them down with water and made sure to wipe them with a napkin to remove any dirt or dust.  I will be showing you guys my "after", but not quite yet.  'Tis but a tease my friend...'Tis but a tease...MAUAHAHA!  Actually, it's been very breezy and windy these past few days and I don't want to spray paint or paint until this weather settles down.

I hope this helps you if you ever come across an old bench like mine!  Can you guess what color I picked for the bench?
[Share to Pinterest]