Saturday, June 28, 2014

Workin' on that Curb Appeal: An Inexpensive solution!

Well, well, well....yeah, it's been almost a month since my last post.  I wanted to take a break from any home improvement projects just to enjoy and appreciate all the work that I've already put into my home.  While I was sitting on my porch a few days ago, enjoying my sweet tea, I looked and realized that the mismatched pots around me were just so blah and the front of my house needed a little sprucing up!

Here's are some BEFORE shots of the front porch area:


One of the biggest "problems" for me were the mismatched pots.  I inherited the pots with dead plants  from the previous owners of the house who just left them on the porch after they moved out.  Umm...thank you? Since moving into my home, my parents (who love anything gardening related) helped me plant an indoor snake plant in one pot and some annuals in the other.  With the recent addition of my yellow park bench, my porch was looking a little more colorful than when I moved in, but it didn't feel cohesive or bright.

The fastest and most inexpensive solution was for me to spray paint my pots!

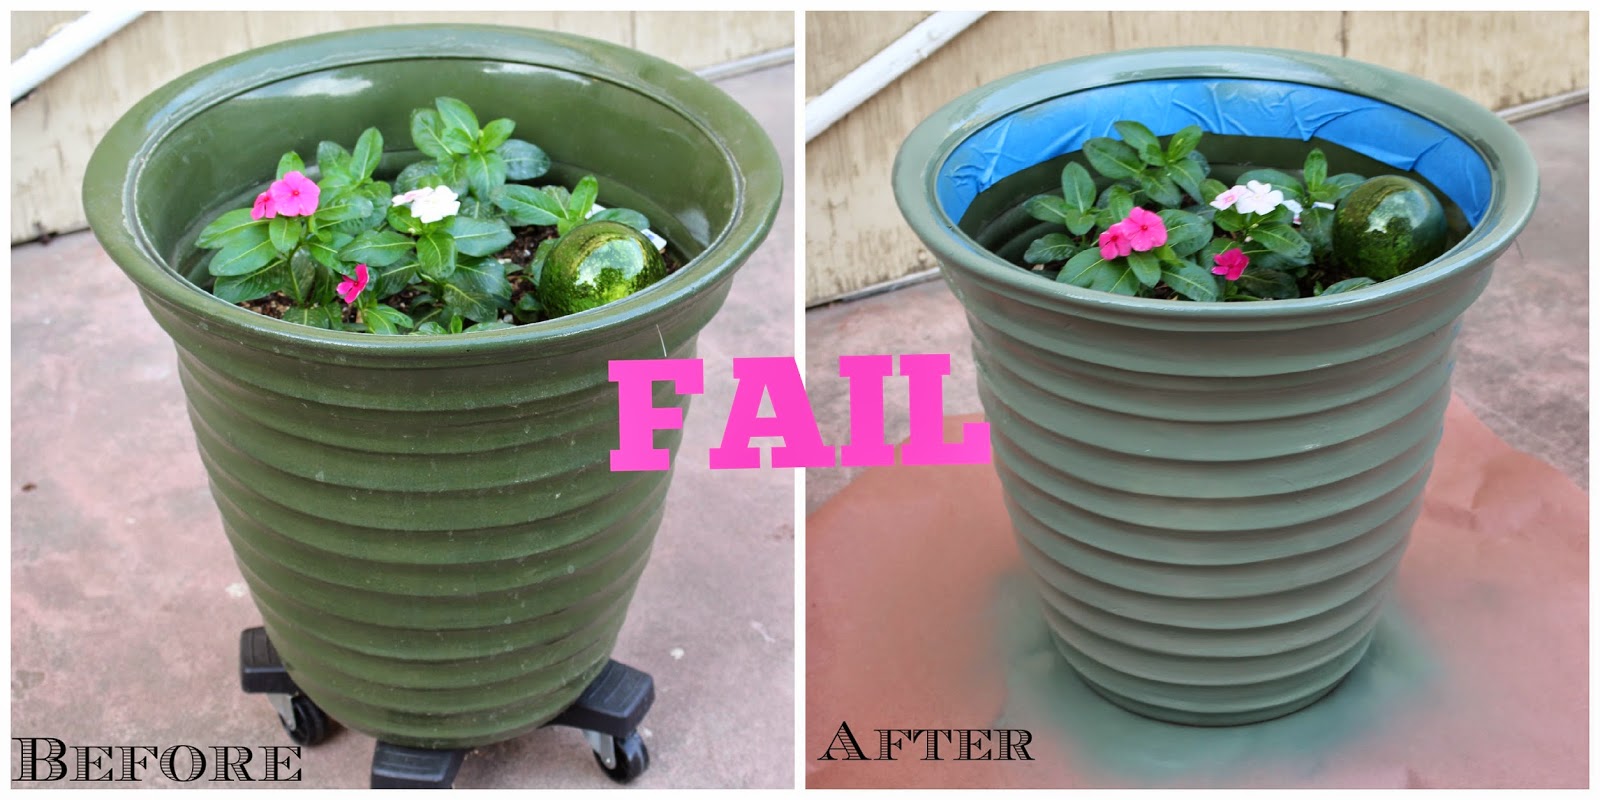
In my 1st attempt, I picked up a can of green spray paint I found in my garage and started spraying the pots.  However, the color choice was a total FAIL!  I went from a dark green pot to a dull green pot...womp, womp.


So, I told myself to "go bold or go home"! Actually, in this case it would be go bold or stay inside!  (Because I'm already home..get it? get it?)  I went to my local hardware store and picked up some spray paint by Rust-o-leum in Seaside (gloss).

Here's my 2nd attempt in progress:

BOLD right?!

Here's what the porch looks like with the bright pots now:


The porch is brighter and the colors are a lot more cohesive.  The bright blue pots also go well with my light blue door!  I love the impact that the painted pots have on my porch.

I definitely want to continue sprucing up the front of my house.  I was thinking about adding a couple of hanging plants, repainting the concrete, and painting the security door?  I know security doors are so yuck, but they are a necessity in the town I live in (sad, I know).


I hope you like the before and after.  Let me know how you've spruced up the front of your house!
[Share to Pinterest]

Saturday, June 7, 2014

DIY Mosiac Tile Coasters


The other morning I was drinking my coffee while getting ready for work and thought to myself:  "self, wouldn't it be nice to have some nice, big colorful coasters that you could leave in the office to use on the desk and makeup table?".  I mean, I already had a cute, beaded set of 4 from Pier 1 that I use in my living room, but I wanted an entirely different set for my office.  So, like any sane person would do, I decided to DIY my own coasters instead of buying them!  

Here are some supplies you might need:

I used cork coasters as my base, but Hobby Lobby also sells metal coaster frames.
Small square tiles, tile adhesive, and tile grout
Grout spreader/sponge
Here are the steps:
1.  I started by laying out the tiles on the cork coasters to figure our what my pattern would look like and if the spacing between the tiles looked even

 2.  Once I determined what pattern I wanted, I applied glue to the bottom of the mosaic tiles and attached them to the cork.  I let the glue dry for about 12 hours.

3.  I then applied the grout.  Not going to lie, this step was tough.  I have never grouted before, but I always thought grout was a thick, sandy oatmeal consistency? The tile grout that I bought from Hobby Lobby was made of 2 layers--a layer of liquid on the top and a tough, hard layer of grout on the bottom.  There weren't any instructions to actually mix the grout and liquid so I just used a plastic spoon to scoop grout out of the container.

I used the grout spreader and basically pressed the grout into the crevices, making sure to apply quite a bit of elbow grease.  I then let the grout set for about 20 minutes before using the sponge side of the spreader to wipe off the excess grout.

This is what the coasters looked like after the grout dried, but before I wiped (polished) the tiles!


Here is a coaster working in action:

That's all!  These coasters would be a nice, little housewarming gift or father's/ mother's day gift.  I hope you try this out!
[Share to Pinterest]

Wednesday, June 4, 2014

Tidy Tip Tuesday on a Wednesday

This week my tip centers around creating cleaning routines and cleaning even when you don't think you need to.


An example would be wiping the toilet down every Sunday, emptying the dishwasher after work, or doing laundry every Tuesday or Saturday.  The trick is to do these chores even when what you're cleaning isn't super dirty or the amount of cleaning isn't huge.  It's all about maintenance.  So even when my floors don't look dirty or obviously dusty, I still sweep/vacuum and steam clean at least once a week.  This way, you can stay on top of house chores and you don't have to wait until the mess gets out of hand!

What are your strategies to staying clean?  I know some people like my sisters or parents would say "just do it", but for someone like me...I just am naturally messy (not dirty, but messy) and I consciously have to create an "action plan" to stay on top of my mess.
[Share to Pinterest]