Showing posts with label inexpensive DIY. Show all posts

Friday, November 14, 2014

A Quick DIY Recipe Binder

What do I do when I have a day-off from work and I happen to have a terrible migraine?  I lay on my couch, in the dark, and organize my recipe binder, of course!  This is how I quickly put my binder together. 

My recipe binder is a regular A5-sized binder I got from Staples.


I thought about making my own recipe binder cover, but...nah...I mean, I had a migraine, remember?  I had a lot of time to search the web for free, printable recipe binder covers, so I used this one from Paging Supermom.  

I also thought these sites had cool recipe covers too:
Prudent Baby (I used this as my old recipe binder cover)

Although I don't have that many recipes, I organize them into specific sections in this binder so that they are easy to find when I want to reference them.  I also keep my take-out menus in the back pocket of the binder.  This thing is like my "one-stop shop" for food, which is why I love it!

I have my recipe binder divided into 5 different sections:
  • Main Dishes
  • Sides
  • Desserts
  • Slow cooker meals
  • Soups/Salads


I made my own dividers by cutting decorative card stock down to size and using Semikolon sticky tabs as my divider labels.  I laminated the dividers to make sure that they would be easier to clean if I ever spilled anything on them.  


I also use page protectors for each recipe so that I can wipe off any spills.  I don't want to have to re-print a recipe every time one gets dirty or wet.


Most of the recipes in this binder are ones I've found online.  I also have a couple of cookbooks with recipes I really like, but I don't see the point in typing those recipes and placing them in this binder.  To me, the purpose of this binder wasn't to put ALL of my favorite recipes into one spot.  I just wanted to organize my "loose" recipes (recipes I printed from the world wide web) and take-out menus so that I didn't have to go on a hunt every time I wanted to make a certain dish.

If you have a little bit of time in your day and you have recipes in a drawer in your kitchen, I encourage you to put a binder together too!  This project was really simple and quick.  It also didn't cost me a single penny because I already had everything I needed.  With the holidays rolling around, this would also be an awesome way to plan and organize your holiday dinner recipes!  Through my search today, I also found a lot of inspirational recipe binder pictures on Pinterest that would be cool to check out.  Let me know if you put one together!

[Share to Pinterest]

Saturday, June 28, 2014

Workin' on that Curb Appeal: An Inexpensive solution!

Well, well, well....yeah, it's been almost a month since my last post.  I wanted to take a break from any home improvement projects just to enjoy and appreciate all the work that I've already put into my home.  While I was sitting on my porch a few days ago, enjoying my sweet tea, I looked and realized that the mismatched pots around me were just so blah and the front of my house needed a little sprucing up!

Here's are some BEFORE shots of the front porch area:


One of the biggest "problems" for me were the mismatched pots.  I inherited the pots with dead plants  from the previous owners of the house who just left them on the porch after they moved out.  Umm...thank you? Since moving into my home, my parents (who love anything gardening related) helped me plant an indoor snake plant in one pot and some annuals in the other.  With the recent addition of my yellow park bench, my porch was looking a little more colorful than when I moved in, but it didn't feel cohesive or bright.

The fastest and most inexpensive solution was for me to spray paint my pots!

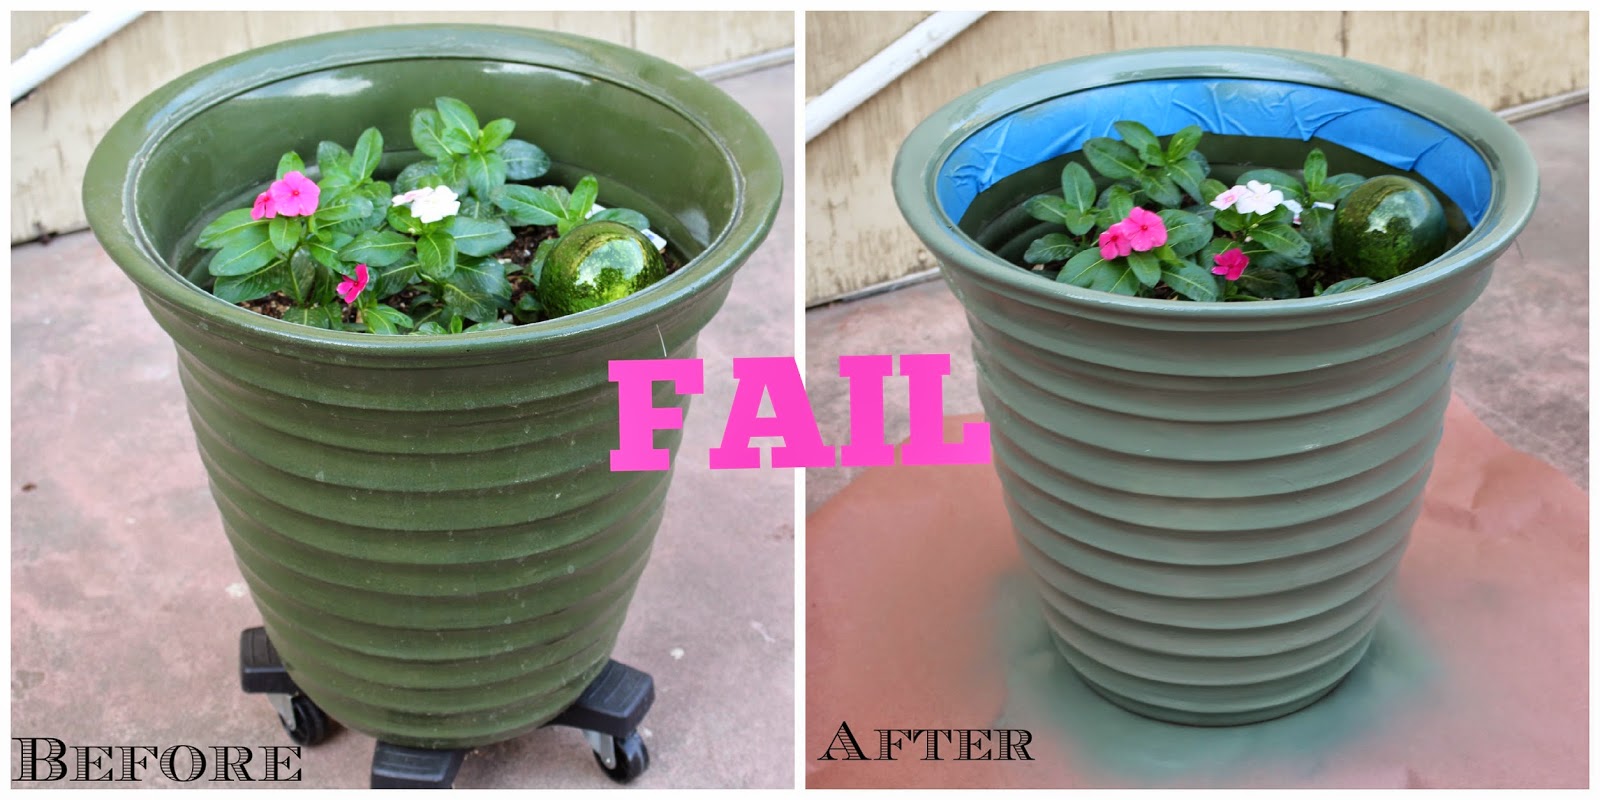
In my 1st attempt, I picked up a can of green spray paint I found in my garage and started spraying the pots.  However, the color choice was a total FAIL!  I went from a dark green pot to a dull green pot...womp, womp.


So, I told myself to "go bold or go home"! Actually, in this case it would be go bold or stay inside!  (Because I'm already home..get it? get it?)  I went to my local hardware store and picked up some spray paint by Rust-o-leum in Seaside (gloss).

Here's my 2nd attempt in progress:

BOLD right?!

Here's what the porch looks like with the bright pots now:


The porch is brighter and the colors are a lot more cohesive.  The bright blue pots also go well with my light blue door!  I love the impact that the painted pots have on my porch.

I definitely want to continue sprucing up the front of my house.  I was thinking about adding a couple of hanging plants, repainting the concrete, and painting the security door?  I know security doors are so yuck, but they are a necessity in the town I live in (sad, I know).


I hope you like the before and after.  Let me know how you've spruced up the front of your house!
[Share to Pinterest]