Showing posts with label life on elizabeth. Show all posts

Saturday, February 21, 2015

ReStore Desk Makeover for Less than $30

If you guys ever saw the pictures of my office when I first moved in, then I will consider the pictures in this post my redemption.  I recently madeover a small desk my boyfriend bought me from ReStore.     I wanted a project desk.  I wanted something old, sturdy, with cool detailing.  I have to say the desk I got is exactly what I had in mind.


The desk was in pretty rough shape.  The wood veneer on one side of the desk was peeling at the base and one of the legs was obviously broken at one time and someone had slapped some glue on it and called it a day.  She also had a missing nail-in slider so every time I touched the desk, it would wobble like it was doing it's own lil' dance.  


To start this project, I wanted to fix the peeling veneer.  I tried gluing the layers back on using wood glue, but once I tried to sand the veneer to even out the surface, the layers just lifted again.  It was super frustrating.  I mean, I had waited 2 whole days for the wood glue to completely dry and within a matter of a few seconds of sanding the veneer lifted?  The Hulk inside me came out and I decided to just rip the strips of peeling veneer off the desk.  I then used wood filler and filled in any gaps and prayed that once it dried, I could sand it and everything would be even and smooth.  Well guess what?  It worked!  So after waiting 24 hours and sanding the side of my table, this is what it looked like:


Spiffy right?  Ok, well I would understand if you're thinking 'No, not spiffy.  Ugly, actually', but you just wait for the good part m'kay?

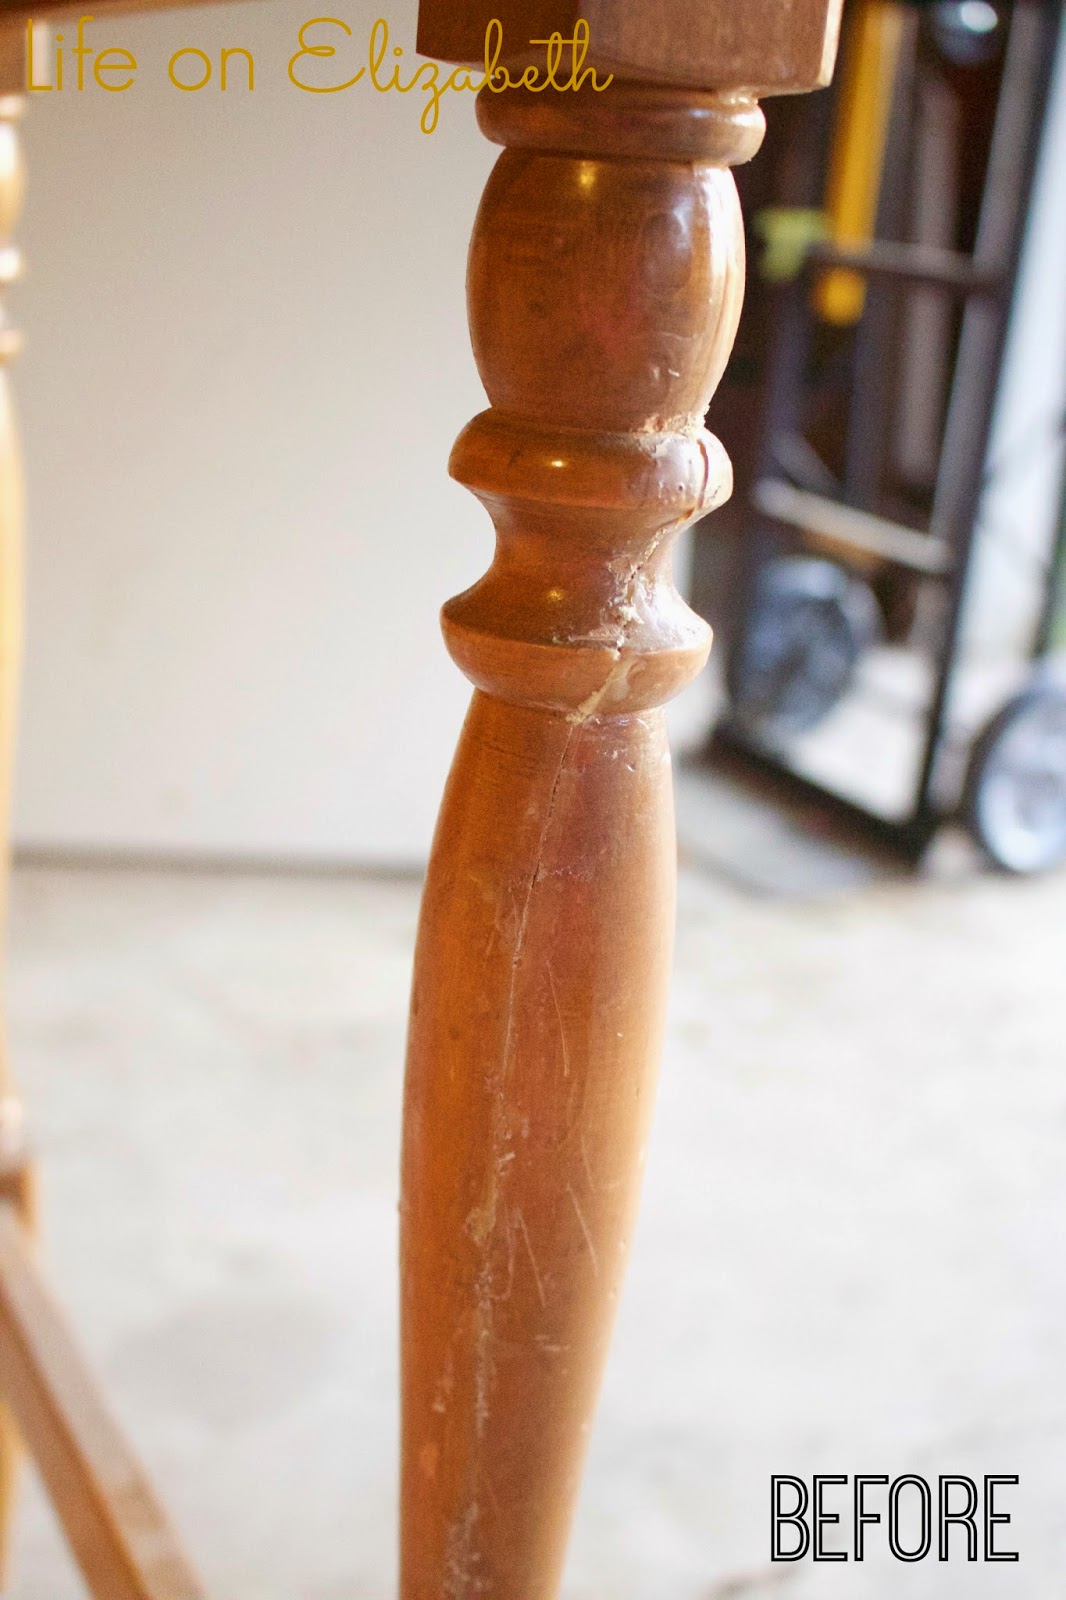
Next, I wanted to even out the surface on the legs of my table.  There were globs of dried glue and an obvious gap from where the leg had previously been broken.  I sanded the glue off the legs to smooth it out, used wood filler again to fix any obvious gaps, and then sanded again to smooth out the wood filler.  Wood filler was definitely my friend on this project.
    

To fix the wobbly-ness, I just popped off the old nail-on sliders and nailed in new ones I got from my local hardware store. Easy peasy!  

After fixing my desk to make sure it was solid and sturdier than when I got it, I cleaned and painted the desk following the steps I used in my side table makeover.  I topped the desk off with a piece of plexiglass I had cut down to size at Lowes to protect the tabletop and rub n' buffed the hardware in gold.  This is what the desk looks like now:


Not bad for $27 spent right?  Considering that this desk was a gift and I used supplies and materials I already had, I only had to spend money on the plexiglass! Woot Woot!  Have you checked out your local ReStore?  When I first read about ReStore on Young House Love, I thought it was just an East Coast thing, but to my surprise there are actually quite a few sprinkled all over California.  ReStore is like my little secret source for old furniture.  What places do you usually hit up for old pieces?


This post is linked up to:

 DIY Show Off Link Party

[Share to Pinterest]

Sunday, December 14, 2014

Reasons to Prepare a Piece of Furniture for Latex Paint and Spray Paint

I am in the middle of re-painting the first piece of furniture I ever spray-painted - a small side table.  While sanding this baby down, I realized that there were so many lessons I learned from this one huge mess of a "painting" mistake.


A little background:  I bought this little side table off of Amazon or Overstock about 5 years ago.  It was originally all black and after having the piece for about a year, I decided to spray-paint it a cream color in a semi-gloss finish.  I did not sand, clean, or prime the piece.

As I have said before, I always recommend sanding, cleaning, and priming a piece of furniture before painting with latex paint or spray-painting because you want the paint to "stick" to your piece of furniture.  Some of you may be thinking "it's paint, paint sticks to everything".  I know because that is what I thought when I spray-painted this piece.  HOWEVER, the pictures below will show you that paint doesn't stick on everything.


Notice in the picture above how the inside of the leg is still black and how there are black blotchy spots along the front of the table.  I can guarantee you that I sprayed the inside of this leg about 5 times, but the color just never adhered to the actual table.  


Yep...more blotchy spots...allll along the front of this table....

...even on the top, left corner of the table.


What can I say?  I am really, really embarrassed by how this table looks, but it was the first piece I ever painted.  The funny thing is I've lived with the table looking like this for the last 4 years...I have no excuse, it just has never been very high on my list of priorities!  

Looking at the side of the table today, I realized that there were also a bunch of drip marks that looked especially bad in daylight.


Again, I have no excuse for why I allowed the piece to look this bad.  The good thing about having a horrible first painting experience like this is that I now know why I need to sand, clean, and prime a piece before painting with latex paint or spray painting.

Before painting a piece of furniture, I always like to start out by sanding with 120 grit sand paper to smooth out the surface.  This is what I started doing to this table today!


I didn't sand the side table down to the original black finish, but I did make sure to sand off all the semi-glossy finish of the spray paint.  I also paid extra attention to the side of the table to smooth out the drip marks!  After sanding the piece, I wiped it down with a damp cloth to get rid of any dust.  

Throughout this next week, I plan on priming and then painting the table with a small sample-sized pot of paint I grabbed from Lowes.  I can't wait to show you guys the before and after for this table!  If you guys didn't see a reason to sand, clean, and prime a piece of furniture before painting it with latex paint or spray-painting it, please refer to the pictures above!  

Also, as I've mentioned in my previous furniture painting post, I like to use Kilz Premium Primer because it is the only one I've tried and it has yet to fail me.  Another primer that I have read many good things about in blogs is Zinsser 1-2-3 water-based primer, which I assume works the same as the Kilz Primer.

I hope this post helps you in your furniture painting adventures!  Hopefully you won't have a horrible first time experience like I did and if you do, don't worry it's just paint!
[Share to Pinterest]

Friday, November 14, 2014

A Quick DIY Recipe Binder

What do I do when I have a day-off from work and I happen to have a terrible migraine?  I lay on my couch, in the dark, and organize my recipe binder, of course!  This is how I quickly put my binder together. 

My recipe binder is a regular A5-sized binder I got from Staples.


I thought about making my own recipe binder cover, but...nah...I mean, I had a migraine, remember?  I had a lot of time to search the web for free, printable recipe binder covers, so I used this one from Paging Supermom.  

I also thought these sites had cool recipe covers too:
Prudent Baby (I used this as my old recipe binder cover)

Although I don't have that many recipes, I organize them into specific sections in this binder so that they are easy to find when I want to reference them.  I also keep my take-out menus in the back pocket of the binder.  This thing is like my "one-stop shop" for food, which is why I love it!

I have my recipe binder divided into 5 different sections:
  • Main Dishes
  • Sides
  • Desserts
  • Slow cooker meals
  • Soups/Salads


I made my own dividers by cutting decorative card stock down to size and using Semikolon sticky tabs as my divider labels.  I laminated the dividers to make sure that they would be easier to clean if I ever spilled anything on them.  


I also use page protectors for each recipe so that I can wipe off any spills.  I don't want to have to re-print a recipe every time one gets dirty or wet.


Most of the recipes in this binder are ones I've found online.  I also have a couple of cookbooks with recipes I really like, but I don't see the point in typing those recipes and placing them in this binder.  To me, the purpose of this binder wasn't to put ALL of my favorite recipes into one spot.  I just wanted to organize my "loose" recipes (recipes I printed from the world wide web) and take-out menus so that I didn't have to go on a hunt every time I wanted to make a certain dish.

If you have a little bit of time in your day and you have recipes in a drawer in your kitchen, I encourage you to put a binder together too!  This project was really simple and quick.  It also didn't cost me a single penny because I already had everything I needed.  With the holidays rolling around, this would also be an awesome way to plan and organize your holiday dinner recipes!  Through my search today, I also found a lot of inspirational recipe binder pictures on Pinterest that would be cool to check out.  Let me know if you put one together!

[Share to Pinterest]