Showing posts with label DIY. Show all posts

Sunday, March 15, 2015

DIY Tufted Foot Stool with IKEA Lack Side Table

I just made my unofficial reading corner in the living room a little more official by DIY-ing a tufted ottoman/foot stool out of an IKEA Lack side table!


Before I begin to tell you how I made my ottoman, let me rewind a little to explain to you how I got the idea to create this ottoman in the first place.  Early last year, I made myself a tufted headboard using screws instead of a needle and thread.  I liked my tufted headboard, but I didn't love it.  There were mistakes I made and little imperfections I saw that just drove me nuts.  So, instead of just throwing the entire headboard away, I decided to dismantle it and reuse the materials.  I will be reusing the wood to build my workbench and I used the foam and batting for this ottoman!

This is what the headboard looked like before I tore it apart...

Are you making the "yuck" face?  I know I am!  
Now, this is how I put my ottoman together.  I decided to use the IKEA Lack side table because it has been sitting in my garage for the last 2 years and it has the perfect dimensions for my green arm chair.


For starters, I screwed off the legs of the side tables and threw them away because I don't like the look of them and I knew they wouldn't go with the ottoman.

Next, I cut 3 inch foam down to size to fit the top of the table.  I used some spray adhesive to stick the foam to the top of the table.


Then, I cut 2" holes in an alternating pattern like you see below.


I covered the foam with batting and stapled the batting to the bottom of the table with my staple gun.

This is not one of my best pictures....but let's trust the process m'kay?
Once, the batting is attached to the top of the table, I poked holes through the batting, into the foam so that the 2" holes were exposed.  Finally, I centered my fabric on top of the ottoman.


The drilling part is pretty easy.  I assembled my washers and screw like so.


I started with the upper most left corner and worked my way outwards, making sure that the creases and tufts were just right before screwing the fabric onto the tabletop.


My tip for this step would be to make sure that the fabric is pulled taut.  Also, using your finger to push the fabric into the hole before screwing it in with the screw driver will allow you to see how the fabric will lay once everything is screwed in.

After you have created all of your tufts, go ahead and attach the fabric to the bottom of the table top with a staple gun.  Trim off the excess fabric.

For the legs, I purchased 4" decorative legs from Lowes and stained them using Walnut by Rustoleum.


This is the final product!  Tada!


This little foot stool is the best addition to my little ready corner because it prevents my short little legs from dangling whenever I try to sit in the chair.  I also wanted to try something different and screwed in the legs using angled plates.  I'm not too sure how I feel about the angled legs, but I definitely love the foot stool.  Let me know if you try this out or tell me what you think in the comments below!

This project is linked up to the The DIY Showoff:


[Share to Pinterest]

Thursday, February 26, 2015

How I Repurposed Old Shelves

On a recent visit to see my closest friends and their precious baby boy, I scored 2 shelves my best friend was intending to throw out.  You don't understand the level of excitement I had when she told me I could have them.  I felt like Charlie when he found the golden ticket or Harry when he caught the Golden Snitch!  Really, I did.

This is what the 2 bad boys looked like after I had taken the particle board tops off.


I spray painted the metal parts white and decided to cut some 1x7.25" wood boards to use as the tops of the shelves.  I started to stain the wood boards with Minwax's Weathered Gray, but as soon as the stain dried on all the boards, I realized the color just wasn't me.  The color was too gray and too light...not that the name Weathered Gray is a correct description or anything.  (sarcasm implied)  So as usual, I reverted back to Espresso, my favorite stain color of all time.

Because the shelf brackets were fairly deep, I attached 2 pieces of wood using my kreg jig.


After attaching the boards to the top of the shelves, this is what they looked like.  I used one shelf in my office and the other above my drink station.

Kitchen Shelf
Office Shelf

I love the beautiful detailing on the brackets and the fact that I spent less than $40 repurposing both of them makes them even better!  What do you think?

This post is linked up to:
That’s What Che Said
[Share to Pinterest]

Saturday, February 21, 2015

ReStore Desk Makeover for Less than $30

If you guys ever saw the pictures of my office when I first moved in, then I will consider the pictures in this post my redemption.  I recently madeover a small desk my boyfriend bought me from ReStore.     I wanted a project desk.  I wanted something old, sturdy, with cool detailing.  I have to say the desk I got is exactly what I had in mind.


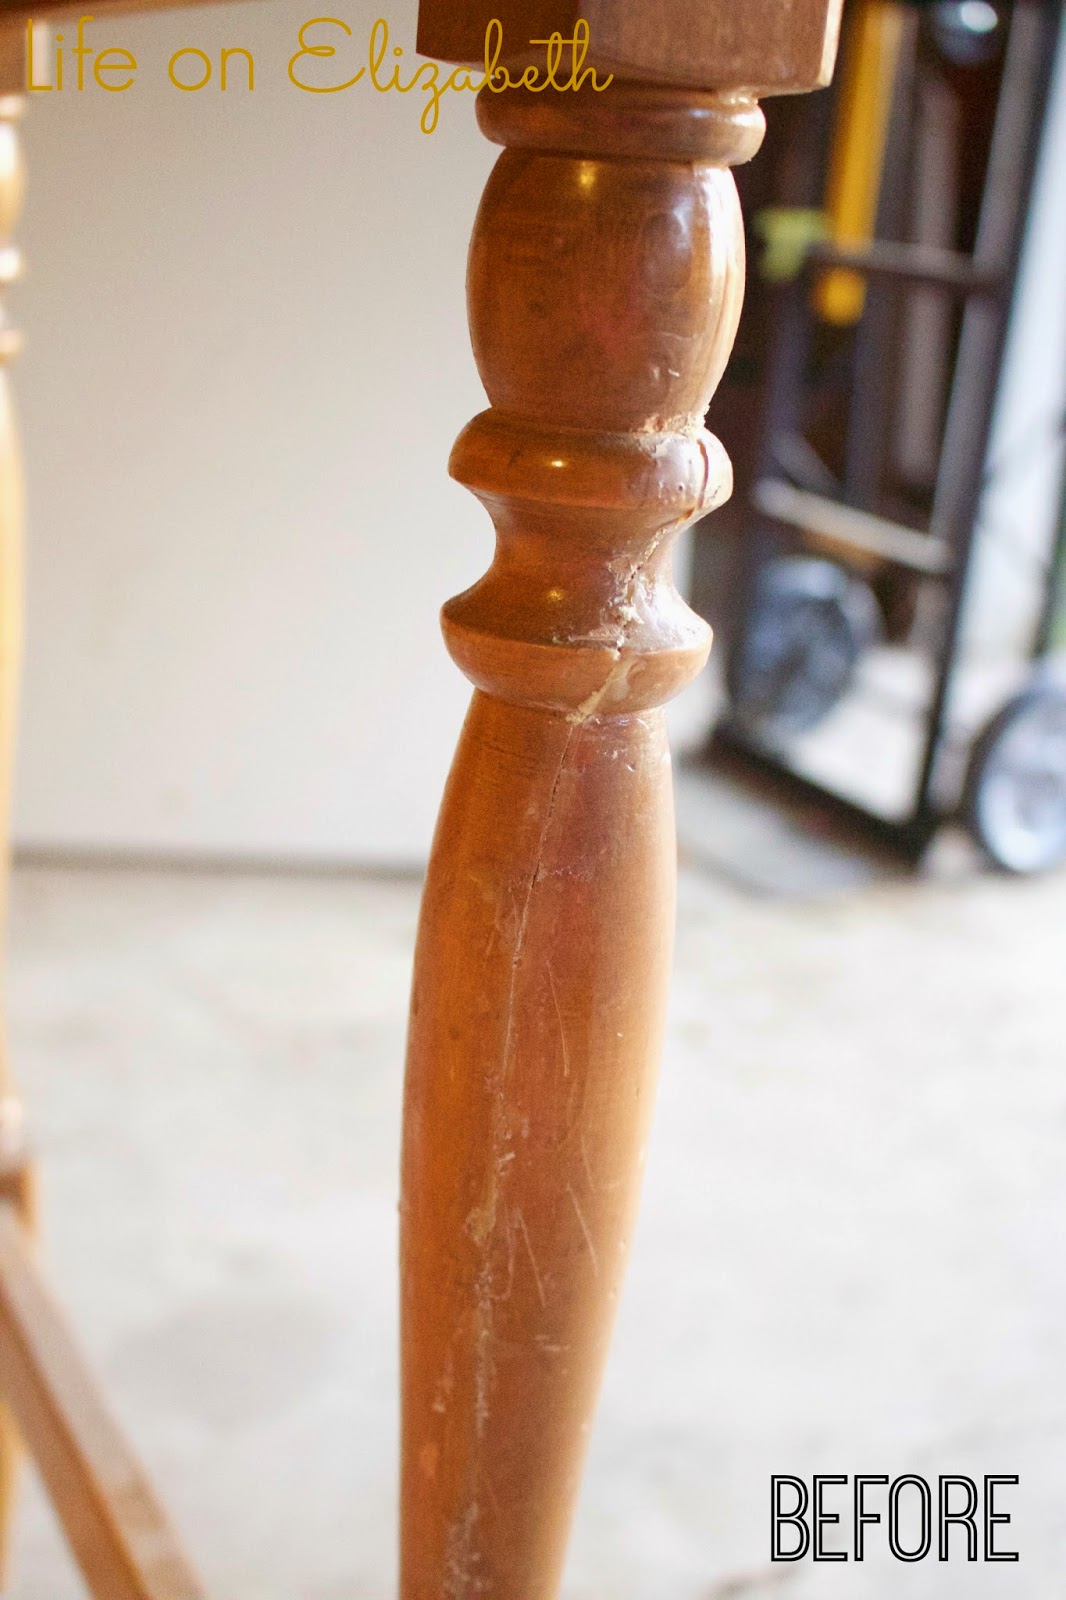
The desk was in pretty rough shape.  The wood veneer on one side of the desk was peeling at the base and one of the legs was obviously broken at one time and someone had slapped some glue on it and called it a day.  She also had a missing nail-in slider so every time I touched the desk, it would wobble like it was doing it's own lil' dance.  


To start this project, I wanted to fix the peeling veneer.  I tried gluing the layers back on using wood glue, but once I tried to sand the veneer to even out the surface, the layers just lifted again.  It was super frustrating.  I mean, I had waited 2 whole days for the wood glue to completely dry and within a matter of a few seconds of sanding the veneer lifted?  The Hulk inside me came out and I decided to just rip the strips of peeling veneer off the desk.  I then used wood filler and filled in any gaps and prayed that once it dried, I could sand it and everything would be even and smooth.  Well guess what?  It worked!  So after waiting 24 hours and sanding the side of my table, this is what it looked like:


Spiffy right?  Ok, well I would understand if you're thinking 'No, not spiffy.  Ugly, actually', but you just wait for the good part m'kay?

Next, I wanted to even out the surface on the legs of my table.  There were globs of dried glue and an obvious gap from where the leg had previously been broken.  I sanded the glue off the legs to smooth it out, used wood filler again to fix any obvious gaps, and then sanded again to smooth out the wood filler.  Wood filler was definitely my friend on this project.
    

To fix the wobbly-ness, I just popped off the old nail-on sliders and nailed in new ones I got from my local hardware store. Easy peasy!  

After fixing my desk to make sure it was solid and sturdier than when I got it, I cleaned and painted the desk following the steps I used in my side table makeover.  I topped the desk off with a piece of plexiglass I had cut down to size at Lowes to protect the tabletop and rub n' buffed the hardware in gold.  This is what the desk looks like now:


Not bad for $27 spent right?  Considering that this desk was a gift and I used supplies and materials I already had, I only had to spend money on the plexiglass! Woot Woot!  Have you checked out your local ReStore?  When I first read about ReStore on Young House Love, I thought it was just an East Coast thing, but to my surprise there are actually quite a few sprinkled all over California.  ReStore is like my little secret source for old furniture.  What places do you usually hit up for old pieces?


This post is linked up to:

 DIY Show Off Link Party

[Share to Pinterest]

Thursday, February 19, 2015

How to Make a Pinboard

Spring is coming and you know what that means... S-P-R-I-N-G C-L-E-A-N-I-N-G!  In an attempt to tidy-up my office area, I made a pinboard to help me stay organized.  This is how I did it.


Supplies needed:
Cork sheets
Picture frame
Fabric
Staple gun or hot glue gun


Steps:
1.  Use the backing of the picture frame as a guide and measure out the roll of cork to fit the inside of the frame. Because the cork was actually pretty thin, I decided to use 2 layers instead of just 1.  The only gripe I have about the cork that I used is that it is slightly....brittle?  The cork tore very easily while I was cutting it so I would recommend being very careful if you decide to use the same kind I did. (I got my rolls of cork from Hobby Lobby)

2.  Lay the fabric face down.

3.  Lay the cork on top of the fabric.

4.  Lay the backing for the picture frame on top of the cork.

5.  Wrap the edges of the fabric around the cork and attach the fabric to the backing using a staple gun or glue gun.  This part was a little tricky because you want to make sure there isn't a lot of excess fabric around the edges.  The excess fabric will affect how well everything will fit into the frame so you want to make sure to trim as much fabric off as you can.  Also, make sure your fabric is aligned so that the pattern on your fabric looks straight...unless you don't mind the crooked look...then you know, you do you boo!


5.  Put everything into the frame and voila!


I hope you liked this simple project and decide to try it out for yourself!  I don't think I've typed "cork" more in my life so I hope that counts for something..haha!  I will be using my pinboard for inspirational quotes and pictures.  Let me know if you decide to try this project of if you'd like to see more simple DIY projects like these!


[Share to Pinterest]

Thursday, January 15, 2015

Ikea Drawer Makeover

Lately, I've been trying to put my office together so that it looks less like a college student's study cave and more like a grown-up's work space.  I am almost there...and you bet I'm going to show you my before and after shots!  But today, I want to show you a quick before and after of a set of Ikea drawers that I repainted.

I got this set of Ikea drawers about 8 or 9 years ago to help me keep my desk organized.


I never painted the set of drawers and I never really tried to personalize it either (aside from the random band stickers I had stuck on the sides).  A few months ago,  I started using the drawers to organize my planner supplies and accessories so I wanted to paint it a bright and fun color!


I used Valspar's Coral Reef.  The color of the paint is actually a little deeper than the picture shown above, but I love it!  The color is the perfect pop of color I was looking for and it complements the color of my gold book shelf.  This was such a quick and easy makeover!


[Share to Pinterest]

Saturday, December 20, 2014

Pinterest Did it Again! (DIY Rustic Bathroom Shelves)

Lately, I've been trying to organize my main bathroom and make it pretty for myself and my guests.  When I first got my house, I knew I had to work on the main bathroom immediately and make sure it was useable because it was the only bathroom with a shower.  I had the contractors re-tile the bathroom floor and the shower.  I re-painted the cabinets and replaced the light fixtures, but that was it.  I neglected to add any decor or personal touches to the bathroom since moving in.  Now that most of my main living quarters have been furnished, I wanted to bring my attention back to the bathroom.  After all, it's the space my guests are most likely to see (aside from my living room and kitchen, of course).

This is what the entrance of my main bathroom looked like:


I got the Ikea cart a couple of months ago to help me with my restroom organization...HAHA, but as you can see, there is a lot of vertical space I wasn't using.  I needed shelves!  

I went on Pinterest and found a lot of different pictures for inspiration, but I ultimately chose to make shelves like the ones created by Craftsman Drive & Liz Marie Blog.  The project was actually very simple and would be a good starter weekend project if you were looking to add more shelving to any part of your house.  

These are the supplies I used:


I got all of my supplies from Home Depot, but I'm 99.999% sure all of these supplies are available at any big box hardware store.

Sanding block
Shelf Brackets
1x8" wood (cut down to 24" pieces)
Minwax Wood Finish in Espresso
#6 3/4" screws
Polycrylic
2 Foam Brushes

I started by sanding the edges of the shelves with a sanding block.  I didn't want any obviously sharp edges.  I wanted these shelves to look more rustic and slightly used!  Then, I used a foam brush to apply the stain in small sections and made sure to quickly wipe off any excess stain so that I would have an even finish.  I let the shelves dry and sit for an hour, then I applied a second coat.  I let the second coat dry overnight.


While the stain was drying, I spray painted my shelf brackets a darker gray color and let them dry overnight.

The next day, I applied Minwax Polycrylic to protect my surface and seal everything in.


I let the protective finish dry overnight.

The installation process for these shelves was actually the trickiest.  Since I was installing 2 rows of shelves, I wanted the brackets to perfectly line up with one another but also be evenly spaced out.  I figured the easiest way to do this was do lightly draw 2 evenly spaced vertical lines using my level.  This way I would have a guide for where my shelf brackets should be installed.  I also made sure to draw 2 horizontal lines 16 inches apart to mark my shelf placement.

After attaching the brackets, I attached the shelves to the brackets using 3/4" screws.  I used a damp cloth to wipe off any visible pencil marks.  That's it!


These shelves were so easy!  If you are looking to add some simple, rustic shelves to your home, I definitely recommend trying this.  The best part?  The entire project cost me less than $20!


[Share to Pinterest]

Friday, November 28, 2014

Dining Room Hutch Before & After

I finally finished painting my hutch!  Come on and say it with me...Hip Hip Hooray!  Hip Hip Hooray!!


This hutch was a hand-me-down from the same friend who gave me this side table:


I madeover the side table back in April, but held off on starting the hutch because the thought of sanding and prepping a piece this large was just too overwhelming for me.  After re-painting my vanity with Annie Sloan Chalk Paint and seeing how easy the process was, I knew I wanted to re-do my hutch using Chalk Paint too!

This is what the hutch looked like before I put any paint on it:


I don't have a "before" picture of the top piece of the hutch, but you basically get the idea of how dark the wood was.  Overall, the piece was in pretty good condition.  There were only a few dings on the edges of the hutch, but that's to be expected for a piece that's over 20 years old!

Before I applied any paint, I made sure to remove as much of the hardware as I could.  I used goo gone to remove any sticky residue, then wiped down the hutch with a 1:1 alcohol:water mixture to remove any dust and residual dirt.

I started painting in the garage, but when it started raining, we moved the piece into the house and I painted the hutch in my dining room.  If you have ever used Annie Sloan Chalk Paint before, you would know that it is a water-based paint and it doesn't have the typical "paint smell" you would expect from latex paints.

This is a picture of the hutch in progress:


3 coats of paint and 2 coats of wax later...


Here's a close up of the distressing details on the hutch:


The handles were originally more of a brass-y finish, but I dry-brushed Rub 'n Buff in Gold Leaf to get the finish that you see in the pictures above.

Here are some more shots:


I know, I know...I hate my ceiling fan too, but this room is a work in progress...

And just because I started decorating my Christmas tree, I wanted to include those pictures too...you know, just for funsies!


Isn't she gorgeous?  I love this hutch to pieces and, again, I am so thankful to my friend Ben and his family for thinking of me when they wanted to get rid of their hutch and side table.  I feel like this piece adds so much character to an otherwise bare dining room!  Let me know what you think!


This post is linked up to:  A Bowl Full of Lemons Blog, One Project at a Time: 12/2/2014
[Share to Pinterest]

Friday, November 14, 2014

A Quick DIY Recipe Binder

What do I do when I have a day-off from work and I happen to have a terrible migraine?  I lay on my couch, in the dark, and organize my recipe binder, of course!  This is how I quickly put my binder together. 

My recipe binder is a regular A5-sized binder I got from Staples.


I thought about making my own recipe binder cover, but...nah...I mean, I had a migraine, remember?  I had a lot of time to search the web for free, printable recipe binder covers, so I used this one from Paging Supermom.  

I also thought these sites had cool recipe covers too:
Prudent Baby (I used this as my old recipe binder cover)

Although I don't have that many recipes, I organize them into specific sections in this binder so that they are easy to find when I want to reference them.  I also keep my take-out menus in the back pocket of the binder.  This thing is like my "one-stop shop" for food, which is why I love it!

I have my recipe binder divided into 5 different sections:
  • Main Dishes
  • Sides
  • Desserts
  • Slow cooker meals
  • Soups/Salads


I made my own dividers by cutting decorative card stock down to size and using Semikolon sticky tabs as my divider labels.  I laminated the dividers to make sure that they would be easier to clean if I ever spilled anything on them.  


I also use page protectors for each recipe so that I can wipe off any spills.  I don't want to have to re-print a recipe every time one gets dirty or wet.


Most of the recipes in this binder are ones I've found online.  I also have a couple of cookbooks with recipes I really like, but I don't see the point in typing those recipes and placing them in this binder.  To me, the purpose of this binder wasn't to put ALL of my favorite recipes into one spot.  I just wanted to organize my "loose" recipes (recipes I printed from the world wide web) and take-out menus so that I didn't have to go on a hunt every time I wanted to make a certain dish.

If you have a little bit of time in your day and you have recipes in a drawer in your kitchen, I encourage you to put a binder together too!  This project was really simple and quick.  It also didn't cost me a single penny because I already had everything I needed.  With the holidays rolling around, this would also be an awesome way to plan and organize your holiday dinner recipes!  Through my search today, I also found a lot of inspirational recipe binder pictures on Pinterest that would be cool to check out.  Let me know if you put one together!

[Share to Pinterest]