Sunday, March 8, 2015

My Experience Building a Console Table

If you follow me on Instagram (@mylifeonelizabeth), you would have seen a picture of the console table I built following the Rustic X Console Table plans from Anna White.  This is the console table I built:


I made small modifications to my table because I forgot to add the X's to the sides.  Instead, I used 2x2's to finish off the side edges.


I love the table!  It's the perfect size for my entryway and provides the adequate amount of storage so the tabletop doesn't look too cluttered.  I also love that because I built the table myself out of real wood, I know the construction is super durable and I was able to stain the table to whatever color I wanted!

The cost of supplies for my console table came in at about $130, which is cheaper than console tables I can find at most big box stores.  The plans provided by Anna White were definitely easy to follow and should be read over once or twice before starting the build.  The most tedious part of the project was cutting all of my wood pieces with my miter saw, which took about 2 hours.  Other than that, attaching the pieces using my Kreg Jig Jr. and pocket screws was really easy and is definitely do-able for a beginner.

TIPS:
  • I recommend having at least a couple of clamps on hand to use with the Kreg Jig and to help you hold the pieces of wood flush against each other so that it's easier to screw them together.  
  • Take your time picking out your pieces of wood to ensure that they aren't bowed because that would definitely affect the construction of your console table.  
  • You'll also need a good orbital sander so that you can smooth and even out the surface of your console table before staining and/or painting.  
  • Remember to always work safely and wear protective gear!  
  • Become familiar with your tools before tackling any project to ensure that you are using them correctly and safely to prevent any injuries! 

If you have thought about building your own furniture and you want to invest in some new tools, I highly encourage you to try building this table.  I was able to do it by myself and you can too!  The only time I would discourage you from attempting this project is if you don't ever plan on building another piece of furniture ever again. If this is the case, then the investment in all the necessary tools might not be worth it if you don't already have the tools on hand.\

If you want to build something for your home, I encourage you to check out Anna White's website if you haven't done so.  There are collections of awesome pictures of other readers/bloggers who have built the same projects.  I would love to know what your first building experience was like in the comments below!
[Share to Pinterest]

Thursday, March 5, 2015

How I Set Up My Drink Station

Remember a few posts ago when I mentioned that Spring is coming?  Well, folks, Spring will be here in about 2 weeks!  You know what that means right?  It's time to do some Spring cleaning, or in my house, Spring clearing.


One of the most "done" and yet un-done areas in my home is my kitchen.  I completely remodeled it and everything is shiny and new, but my main focuses for my kitchen are optimal functionality, organization, and of course cleanliness.  As you can see in the picture below, my kitchen didn't look like it was organized, clean, or functional.


A part of the problem?  I lacked countertop space and if I had just put 1 or 2 items on my counter, the kitchen just looked cluttered.  I also had a wall on the other side of the kitchen that just wasn't being utilized.


I was using the area for my dogs' food and water, but realized it was such a big waste of valuable wall space.  Once I realized that the lack of countertop space was the main issue, I decided that if I moved my Keurig, Ninja blender, and microwave off the counter, I would be regaining a lot of that precious real estate.  So, this is how my drink/microwave/blender station was born.


The table is actually a console table from Cost Plus World Market that I used as my entryway table.  Because I built another console table for my entryway, I decided to reuse this one in the kitchen and it actually fit the length of the wall perfectly.  It was meant to be, you see?  The wall shelf was actually a DIY up-cycle project and works great with the space.  I need to work on decorating the shelf, but I just like knowing that it's there for extra storage if I ever need it.

I love that the table gives me so many storage options.  I use the drawers for my K-cups and boxes of tea bags.  The bottom shelf on the table also gives me a place to put my water bottles and I love how organized the bottles look!  Now, realistically, my blender won't be utilized on this table, but its a great place to store my blender out in the open so that I can easily reach for it when I need it. Personal fact:  I'm really short so anything lower to the ground is better than being higher on a second or third shelf!


This is a shot of my counters now!  Isn't there just so much more space to work with?  Yes, there is still a whole rack of mugs right over there in that little corner, but that's only because I have an unhealthy obsession with mugs and I like to display them!


Clearing up my counter made my kitchen way more functional and also gives me less anxiety.  Before I set up my drink station, I was constantly stressed out about cleaning and organizing my kitchen every time  I used it because I felt like I just didn't have enough space.  Now, I still clean and organize my kitchen every time I use it, but I don't feel as stressed about it and I can actually spread out my ingredients while I'm cooking or baking.  If you have space for a drink station or just a makeshift island in your kitchen, I would totally recommend putting one together!  This little project of mine was an eye-opener for how some spaces are/aren't being utilized optimally in my house.
[Share to Pinterest]

Sunday, March 1, 2015

My Colorful Front Door!

Do you ever look around your house and feel like something needs a little more pizzazz or it's just lacking a little personality?  Well, the other day, while I was putting my new entryway table together, I realized that the interior part of my front door was a plain ol' white.  Just...white.


After looking online and seeing so many bloggers paint their doors black, I realized my door needed just a little more personality.  I wanted to make a statement, but because my living room/entry way is so small, I didn't want to paint it black.  Instead, I decided to use some teal-colored paint by Valspar that I bought last year for another project.


This is what the door looks like now!


BAM!  It's suuppppeeerrrr bright and I thought about stopping midway through painting the door but just decided to commit to it.  It was such a drastic change so I gave myself a few days to see if it would grow on me, and it did because I LOVE IT!  It's a perfectly bright door and adds so much more personality to my little living room.  Have you ever wanted to paint your door a bright color?  Would you buy a house with a bright-colored door?  Let me know!


[Share to Pinterest]

Thursday, February 26, 2015

How I Repurposed Old Shelves

On a recent visit to see my closest friends and their precious baby boy, I scored 2 shelves my best friend was intending to throw out.  You don't understand the level of excitement I had when she told me I could have them.  I felt like Charlie when he found the golden ticket or Harry when he caught the Golden Snitch!  Really, I did.

This is what the 2 bad boys looked like after I had taken the particle board tops off.


I spray painted the metal parts white and decided to cut some 1x7.25" wood boards to use as the tops of the shelves.  I started to stain the wood boards with Minwax's Weathered Gray, but as soon as the stain dried on all the boards, I realized the color just wasn't me.  The color was too gray and too light...not that the name Weathered Gray is a correct description or anything.  (sarcasm implied)  So as usual, I reverted back to Espresso, my favorite stain color of all time.

Because the shelf brackets were fairly deep, I attached 2 pieces of wood using my kreg jig.


After attaching the boards to the top of the shelves, this is what they looked like.  I used one shelf in my office and the other above my drink station.

Kitchen Shelf
Office Shelf

I love the beautiful detailing on the brackets and the fact that I spent less than $40 repurposing both of them makes them even better!  What do you think?

This post is linked up to:
That’s What Che Said
[Share to Pinterest]

Saturday, February 21, 2015

ReStore Desk Makeover for Less than $30

If you guys ever saw the pictures of my office when I first moved in, then I will consider the pictures in this post my redemption.  I recently madeover a small desk my boyfriend bought me from ReStore.     I wanted a project desk.  I wanted something old, sturdy, with cool detailing.  I have to say the desk I got is exactly what I had in mind.


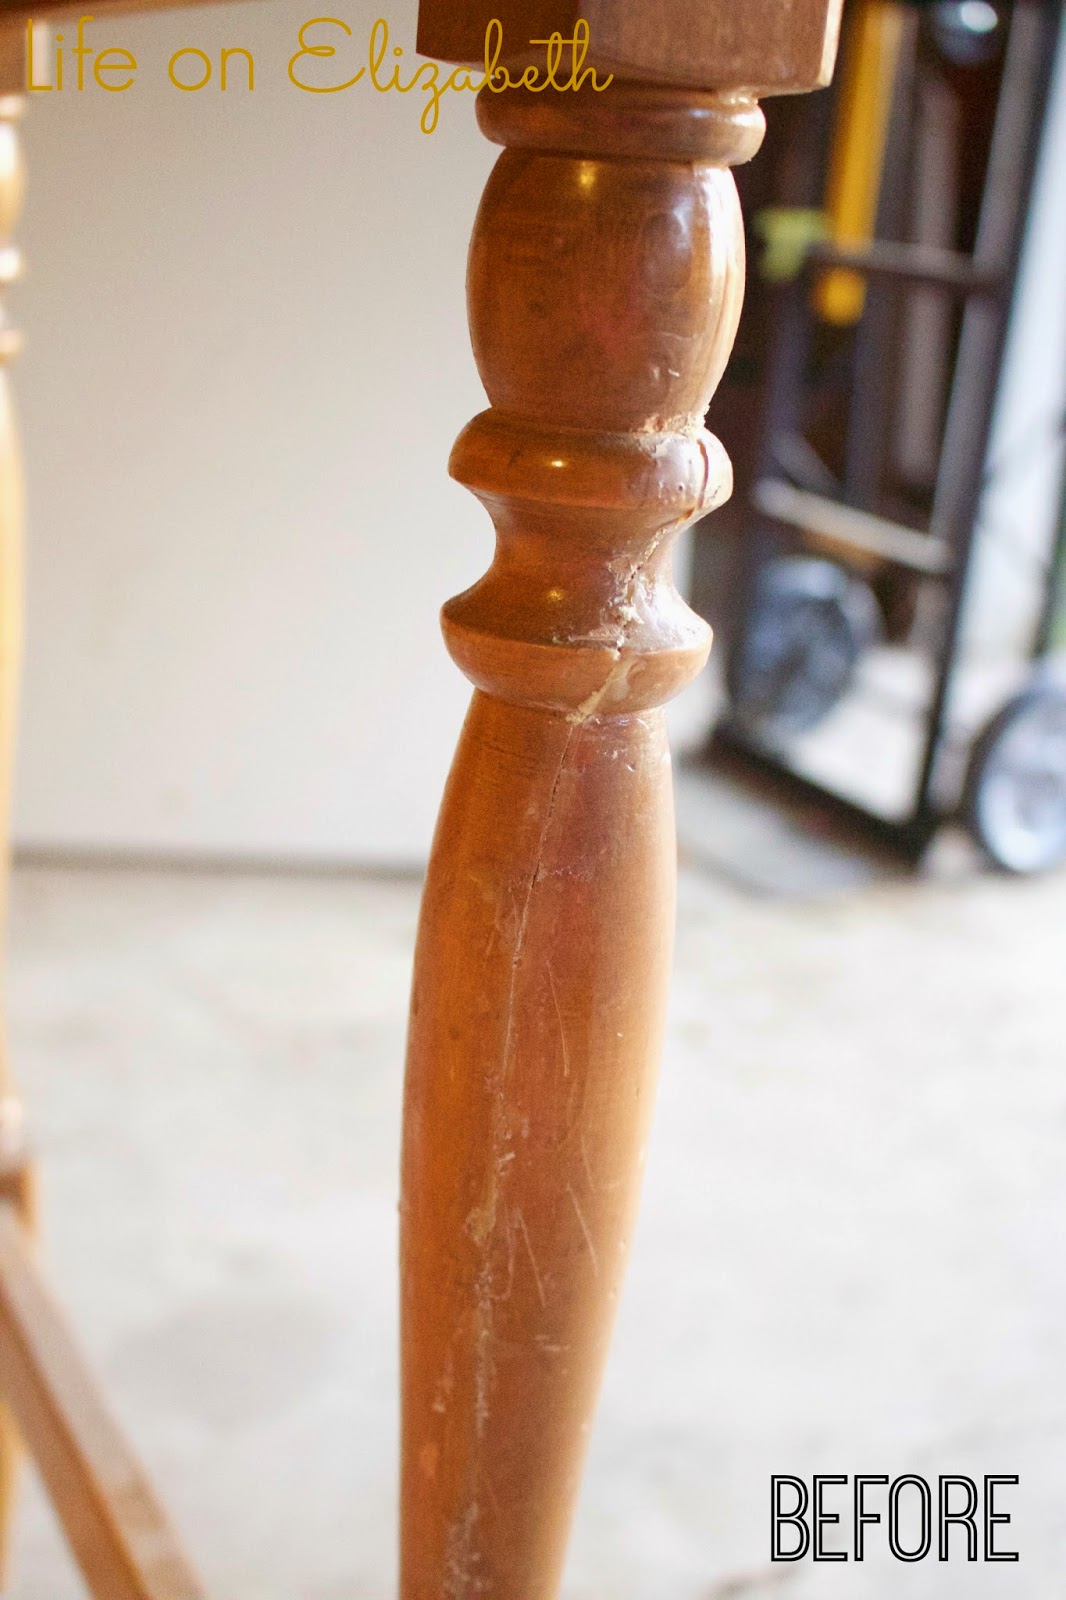
The desk was in pretty rough shape.  The wood veneer on one side of the desk was peeling at the base and one of the legs was obviously broken at one time and someone had slapped some glue on it and called it a day.  She also had a missing nail-in slider so every time I touched the desk, it would wobble like it was doing it's own lil' dance.  


To start this project, I wanted to fix the peeling veneer.  I tried gluing the layers back on using wood glue, but once I tried to sand the veneer to even out the surface, the layers just lifted again.  It was super frustrating.  I mean, I had waited 2 whole days for the wood glue to completely dry and within a matter of a few seconds of sanding the veneer lifted?  The Hulk inside me came out and I decided to just rip the strips of peeling veneer off the desk.  I then used wood filler and filled in any gaps and prayed that once it dried, I could sand it and everything would be even and smooth.  Well guess what?  It worked!  So after waiting 24 hours and sanding the side of my table, this is what it looked like:


Spiffy right?  Ok, well I would understand if you're thinking 'No, not spiffy.  Ugly, actually', but you just wait for the good part m'kay?

Next, I wanted to even out the surface on the legs of my table.  There were globs of dried glue and an obvious gap from where the leg had previously been broken.  I sanded the glue off the legs to smooth it out, used wood filler again to fix any obvious gaps, and then sanded again to smooth out the wood filler.  Wood filler was definitely my friend on this project.
    

To fix the wobbly-ness, I just popped off the old nail-on sliders and nailed in new ones I got from my local hardware store. Easy peasy!  

After fixing my desk to make sure it was solid and sturdier than when I got it, I cleaned and painted the desk following the steps I used in my side table makeover.  I topped the desk off with a piece of plexiglass I had cut down to size at Lowes to protect the tabletop and rub n' buffed the hardware in gold.  This is what the desk looks like now:


Not bad for $27 spent right?  Considering that this desk was a gift and I used supplies and materials I already had, I only had to spend money on the plexiglass! Woot Woot!  Have you checked out your local ReStore?  When I first read about ReStore on Young House Love, I thought it was just an East Coast thing, but to my surprise there are actually quite a few sprinkled all over California.  ReStore is like my little secret source for old furniture.  What places do you usually hit up for old pieces?


This post is linked up to:

 DIY Show Off Link Party

[Share to Pinterest]