Sunday, September 21, 2014

DIY Wall Decor Ideas

As you may or may not have noticed in the pictures I've posted of my home so far, a lot of my wall decor are DIY pieces that I've put together myself.  In this post, I want to share some DIY wall decor ideas with you!


Framed fabric.  Framing pieces of fabric is simple and can be a quick and inexpensive way for you to add color to your walls.  The fabric you choose doesn't necessarily have to come from store-bought scraps.  You can even use old articles of clothing with great patterns that you like.  In my home, I chose to frame one of my late grandmother's scarves as a way to remember her.   


Frame your own paintings.  Another inexpensive wall decor idea is to frame your own paintings!  I decided to dabble in a little watercolor and painted 4 simple flower pieces!  I know these pieces don't look professional, but I love that I created them myself and they each have their own little imperfections created by me!


Create a shrine gallery wall dedicated to your family and friends!  As I have shared in previous posts, I have a gallery wall in my living room dedicated to my family (including four-legged babies) and friends.  This is a great way to display old pictures and adds a very personal touch to your home! 


I hope this post gave you some wall decor ideas!  I would also love to read about any other ideas you may have or have used in your own home!

[Share to Pinterest]

Tuesday, September 9, 2014

Entry Way Progress

Hey guys!  I just wanted to pop in and share the progress I've made in the entry way so far.  Let's start with a "before" photo so that you have an idea what the space looked like when I got my keys...


As you can see, the floors were in bad shape and there was a door (left) that led from the living room to my bedroom.  One of the first things I decided to do was to close up the doorway to create more wall space and really separate the bedrooms from the common living areas.

Now, this is a shot of my living room today...


My floors are now a dark walnut color and the walls are also a lighter grey instead of the yellowish-tan color they were before.

Here are a few more shots...


Baskets, baskets, and more baskets!  As I've mentioned before, I love using baskets everywhere and anywhere to keep things organized. The basket farthest to the left is my "recycling basket".  I use this basket to toss junk mail in and I usually empty it at the end of every week.  This way, I don't end up with a bunch of junk mail on my coffee table, dining table, desk, bedroom, kitchen, laundry area...you get the point!  The middle basket is the "treat basket".  I had to get a basket with a lid so that my 4 dogs couldn't get into the basket of treats when I wasn't home.  This way, I can give my dogs their daily treats before I leave for work and store the jars of treats in this basket instead of leaving them on top of the entryway table.  Lastly, the black and white basket holds clean blankets and linens that I like to use to snuggle up on the couch with.

Let's get a little more close and personal...


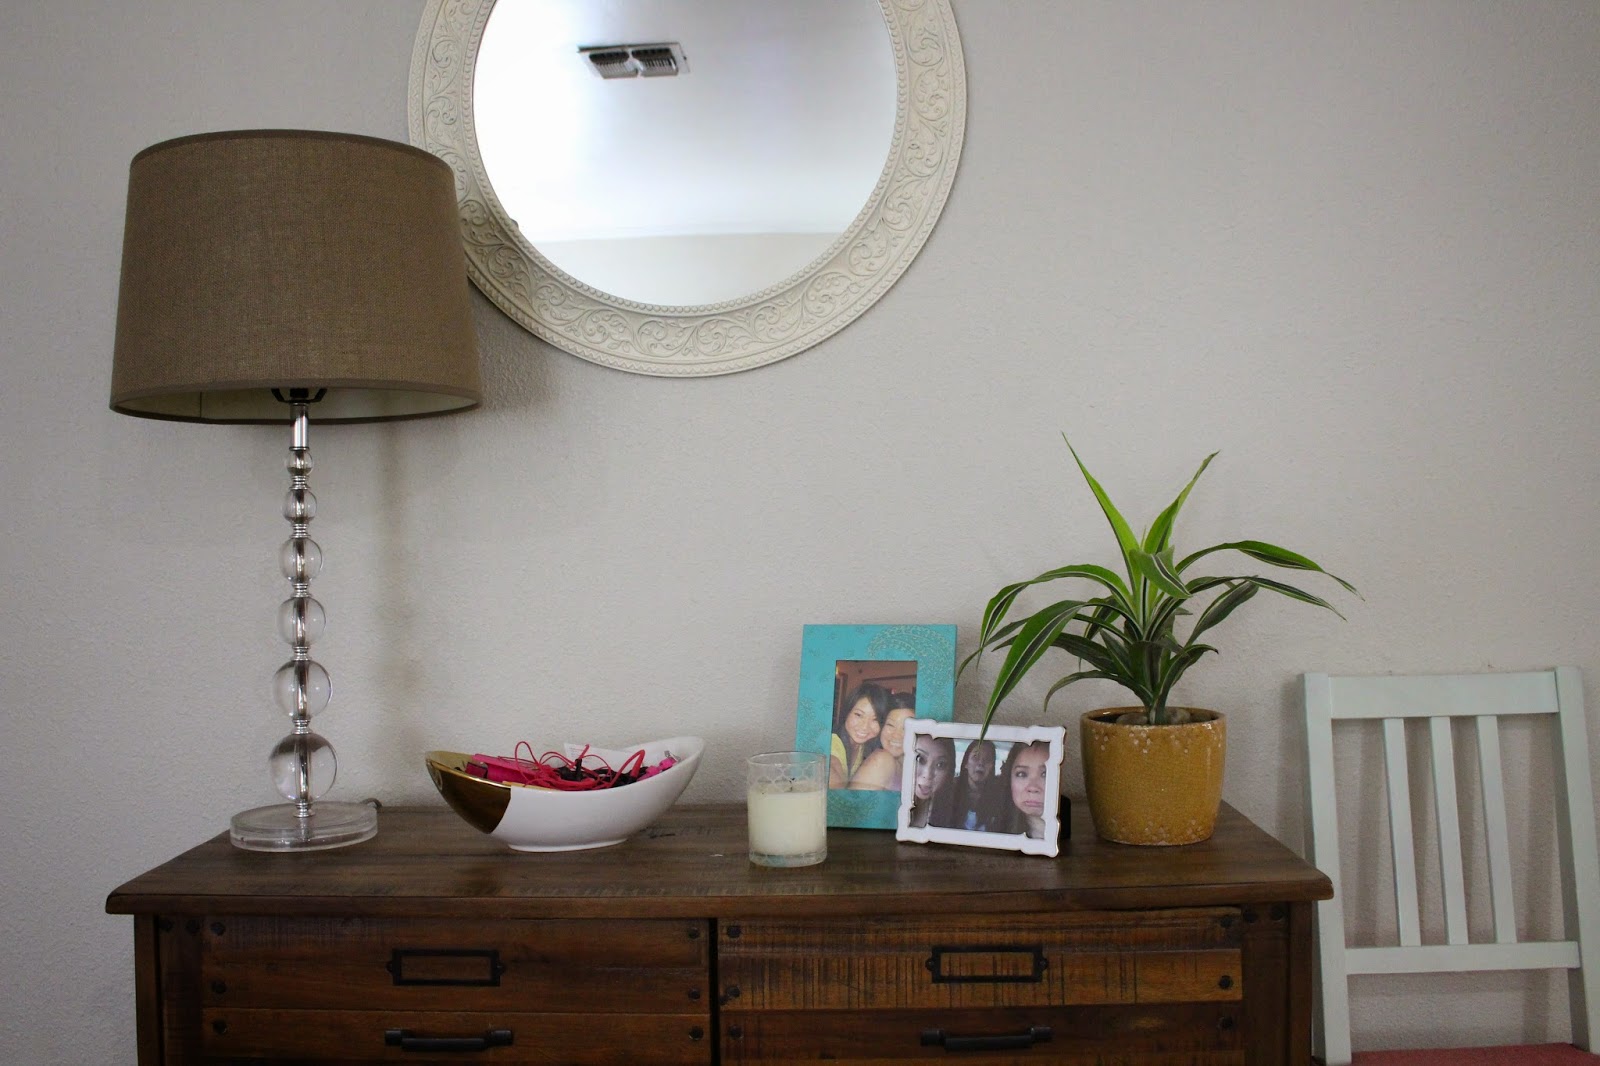
On my entryway table, I just have a bowl that holds a bunch of pens I use for work and headphones I use on my jogs/runs, a couple of pictures of my sisters, a candle (given to me by a co-worker), and a plant (given to me by another co-worker/friend).

So, my entryway doesn't look as sparse as it did they day I moved in, but I still feel like this part of my home needs a few tweaks for this space to be considered "finished".  For starters, I want to add a rug to break up the wood on wood action.

I was thinking about something like this?

via
or this?

via

Also, I want to switch out the little blue chair I have with this...

via
BAM!  This chair screams Wendy!  I love it and can't wait to replace my current blue chair with this because it makes such a bold statement...just what I want for my entryway.

There you have it!  I wanted to give you guys a little tour of my entryway and the plans I have to finish it.  I hope you guys enjoyed!  Have a nice day!

[Share to Pinterest]

Saturday, September 6, 2014

How to Make Homemade Cleaning Solutions

So, I know there are plenty of resources available online for DIY cleaning solutions, but I wanted to share my 3 favorites with you!  The best part about the cleaning solutions I make is that you generally only need 4 ingredients:  alcohol, liquid dish soap, vinegar, and water.  


Mopping Solution:
1 gallon of hot water
1/2 cup of vinegar
1 tsp of dish soap


I usually pour all the ingredients into my mopping bucket and use my mop to "mix" the ingredients. Tip:  The hotter the water, the more quickly the solution will dry off your floors after mopping.  

Sanitizer/All-Purpose Spray:
1:1 alcohol to water


The alcohol helps this solution dry quickly if you plan on wiping down counter tops or desk tops.  Also, the alcohol helps to sanitize surfaces and is great to use on multiple surfaces (i.e. plastic, glass, metal).  Just be sure to spot test on a small area if you are unsure how the surface you're cleaning reacts to alcohol.  
Tip:  Using this solution with a microfiber cloth really helps break up tough messes!

Shower Cleaner/Sink Cleaner:
1:3  dish soap to vinegar


I use this to clean my sink after doing the dishes or to clean my shower.  The soap is a great degreaser and this solution helps me prevent any type of gunk build-up that happens in the sink or shower..yuk!
Tip:  Using this solution with a non-scratching scrubbing pad will help you cut through grease and oils.

Of course, you may be thinking "why go through all this trouble?  Why not just buy your cleaning solutions?".  Well, you see....I still have quite a few store-bought cleaning solutions sitting around the house, but a lot of them have obnoxious smells that make me nauseous and give me migraines.  Also, I feel a lot better about a solution I've made with simple ingredients that I know won't harm me or my dogs.  I have used these solutions for the last few months and they are effective and are all very affordable to make!  The next time you run out of the cleaning solutions you currently use, you should try making one of these and see how you like it!

Side note:  I know there are plenty of people who hate the smell of vinegar, but one thing I've found is that as soon as the solutions that contain vinegar dry or are washed down the drain, the smell dissipates!  So, don't worry about the smell.  Just try it!
[Share to Pinterest]

Monday, September 1, 2014

Confessions of a NEW DIY/ Home Improvement Blogger


I have only been blogging for less than a year, but I have to say that my blog has already been so rewarding and educational.  Looking back at all of my posts so far, I am able to see everything that I've accomplished in the last 8 months.  In a way, this blog was created as a "journal" of my home improvement projects...a journal that I share with anyone who wants to read, of course.  This blog has also been very educational for me because there are aspects of blogging or having a blog that I never considered.  Let me share some of the things I've learned..

1.  Blogging will become more than just posting pictures and directions of your projects.  When I initially thought about starting a home improvement/crafts/DIY blog, I just thought it would be me posting "how-to's" for the projects that I'm working on and the progress I've made on my house. I am coming to find that blogging is also about taking great pictures, giving clear and concise directions, and making sure your blog content is appropriate or interesting.

2.  You might hear crickets for a while.  Believe me, I'm still hearing crickets.  Although the feedback I've gotten have all been positive, 90% of the feedback I've received are from family and friends - the people who love and support me.  I remember reading blog posts about "How to Start a Blog" before I started Life on Elizabeth and every single post mentioned a lack of feedback or very little to no follows.  In a way, I really like this.  Not that I don't want anyone to read my blog, but I want a little (or a lot) of time to find my voice and what my direction really is.  Zero to very little followers will give me time to do that. I hope.

3.  Home Improvement/DIY/Crafts projects don't happen all day, 'er day.  When I do work on a project, I make sure to take as many pictures as I can along the way so that I can have great visuals for the directions I give.  However, there are times when I finish a project and decide not to post about it because I feel like it isn't really interesting or helpful to anyone in the world wide web.  Then, there are times when I just don't want to work on ANY projects (like the last hiatus I had).  Having a 40+ hour/ week job and 4 dogs doesn't give me a lot of time to work on home projects all the time.  Most of the time, I'm just trying to keep my house clean and tidy.

4.  Sometimes I want to write about things that have nothing to do with my home.  What can I say?  I'm a woman with more interests than just my house.  I LOVE makeup, I like finding crazy bargains, and I like to shop.  I'm constantly debating whether I should post about the things I've bought or the makeup I love.  I know blogs should have a specific idea or focus, but I can't help it.  I really do see this blog as my journal for my life (in my new home).  So I'm just going to blog about anything and everything I want, ok?  Ok.

So, that's it.  That's the list of things I've learned in the last 8 months of blogging.  Even though having a blog turned out to be a bigger hobby than I had originally thought, I love how blogging gives me a creative way to share my projects!  Are you a new blogger too?  What have you learned from your blog?
[Share to Pinterest]

Sunday, July 20, 2014

DIY Faux Chalkboard Wall Art

I have finally started decorating my dining room walls, and like always, I wanted to add a personal touch!  I love the idea of chalkboard wall art, but I wanted something a little easier to clean and maintain.  So, I decided to create a faux chalkboard!  Let me tell you how!


Supplies needed:
  • Black Posterboard
  • White Paint Pen
  • Picture Frame


I started the project out by searching for kitchen/dining room/home-related quotes that I might have wanted to use.  I also looked at chalkboard wall art pictures on pinterest and google to get inspiration for the types of fonts I wanted to use and the different ways words could be arranged on my poster board.

I cut the black posterboard down to size so that it would fit within the frame.  

Then, I freehanded everything onto the black posterboard.  If you are uncomfortable with the thought of free-handing your letters, you could definitely lightly pencil the words in, then trace with the white paint pen.  However, I believe the little mistakes you make while free-handing add character to your piece of wall art and make it unique!  So don't be afraid to attempt this without drafting it with a pencil first.

Once I was finished, I popped the posterboard into the frame and...voila!

This is what my finished product looks like:


...And this is what it looks like in my dining room:


The fun thing about this project is that the words and style you use are totally up to you!  Looking at chalkboard wall art pictures gave me a lot of inspiration for this project and I definitely recommend looking at different pictures to get an idea of what you want your piece to look like.  This was a quick and inexpensive project to add a little personal touch to my dining area.  I hope you try this project and would love to see pictures if you do!
[Share to Pinterest]