Saturday, November 1, 2014

How to Update an Old Vanity!

Hey guys!  Do you want to see how I turned this:


...into ...


this?

I recently bought some Annie Sloan chalk paint in Old White for my dining room hutch and was inspired to makeover my vanity because the painting and waxing process is so easy for chalk paint!  With some chalk paint, a piece of glass, and a new mirror, I was able to completely transform my vanity so that it better suites my current decor and brightens up my office/ makeup room.

The makeover process was actually pretty quick and simple.  I started by clearing off the surface of my vanity and emptying out both drawers.  


As you can see, any kind of skin-colored powder foundation is extra-visible on black surfaces, which is another reason why I wanted to paint this sucker!

I then wiped down the entire vanity, including its legs, with some all-purpose cleaner.  When re-painting any piece of furniture, you want to make sure that your surfaces are clean and free of any dust or dirt.  You want to make sure the paint can "stick" to the surface you're painting.


BAM!  Look at what a little elbow grease and actual cleaning can do!  I could have stopped here and kept on using my vanity as is, but this is a post about a makeover, not cleaning.  Silly!

At this point, I screwed the knobs off of each drawer and started painting with the chalk paint.  No sanding or priming or stripping needed!...Yeah, do you hear that?  That's the sound of angels singing. Singing because Annie Sloan chalk paint is...AMAZING!

This is what the piece looked like after 1 coat of paint:


The coverage was pretty good, but I was a little nervous.  The paint is a thicker consistency and I was afraid that after my second coat, I would still have a bunch of streaky patches.  I wasn't sure why I was nervous.  I mean, nearly everyone who has used Annie Sloan chalk paint has raved about it.  This stuff is supposed to be awesome, right?  So I waited about 2 hours and applied my next coat.

This is what the vanity looked like after the 2nd coat:


The finish was opaque and there was no need for me to paint on another coat.  I was so excited, but nervous at the same time.  Is that all?  Can it really be this easy?

I let the vanity sit overnight just to make sure all layers of paint were dry.  Then I started lightly distressing areas of the vanity where you would normally see signs of wear and tear.  Annie Sloan chalk paint is described as a decorative type of paint that is perfect for distressing and creating that shabby-chic, antique-y look.  


I lightly sanded the edges of the vanity with a 120-grit sanding block to get a nice worn-out look.  I could have gone wild with sanding, but decided to be conservative and keep it to a minimum.  

After sanding and wiping down the surface of the vanity to remove any dust, I applied Annie Sloan Soft Wax in Clear.  I learned that a very teensy, tiny amount of wax goes a loooonggg way.  I used a paint brush to apply my wax then wiped off any excess.  The wipe-off process was the trickiest for me.  I started with regular ol' kitchen paper towels, but they didn't seem to absorb very much of the wax and the paper towels tore to pieces too quickly.  Then, I tried tearing up an old white t-shirt to wipe the wax off, but that sucker had so much lint on it that I started to see little pieces of lint embedded in my wax!  Aggghhh! This is when panic and frustration started to set in.  Did I just ruin my vanity?  Do I have to start over?  Nope.  Like always, I calmed down and figured it out.  My White Rags Paper Cloths by Tool Box Brand were the perfect consistency and had great durability.  There was also zero to no lint on these paper cloths so they were perfect!

I let the wax cure for 3 weeks and then had a piece of glass cut down to size at my local hardware store for about $13.99.  I bought the mirror on a HomeGoods run and the rest is history!


Please let me know what you think of this before and after!  This project is very budget-friendly and totally do-able.  You should try it!...I mean, if you want to, that is.
[Share to Pinterest]

Friday, October 24, 2014

How to Close a Large Opening in Your Wall

A few months ago, I had my half bath demo-ed.  Everything was taken out.  The floor tiles, toilet, medicine cabinet, sink. Everything.

This demolition project left a gaping hole in my wall where the medicine cabinet used to be.


Naturally, I tried to find a medicine cabinet that fit the measurements of the opening and still had the look that I was going for.  After weeks and weeks of looking online and going into big box stores, I gave up.  I mean, the half-bath is so tiny...what would be the purpose of a medicine cabinet anyways? More storage?  Yes, but with very little wiggle room, I didn't ever see anyone using the half-bath as anything other than a "powder room".  Just a room where you pop in, do your business, wash your hands, and then pop out, ya' know?

So, I decided to use a regular, ol' wall-mounted mirror.  But first, I had to close up that opening and this is how I did it:

Supplies needed:

  • Joint compound
  • Compound knives:  4" and 10"
  • Dry-wall tape
  • Wood screws (I used 1.5" screws)
  • Dry-wall screws
  • 2x3's or 2x4's
  • Measuring tape
  • Drill (for your screws)

1.  Use 2x3's or 2x4's (whatever suites the area better) to create a frame for your drywall.  I boxed in the opening and used wood screws to attach the new wood pieces to the existing frame.


2.  When screwing in your wood pieces, make sure to leave a gap between the edge of your wood and the edge of the wall so that when you screw your drywall pieces onto the frame you've created, the drywall sits flush against the wall.


I left a 1/2" gap so that when I attached my 1/2"-thick piece of drywall, the drywall sits flush against the wall.

3.  Use drywall screws to attach the drywall to your frame.


4.  Lay drywall tape over the seams.


Side note/ interjection/ funny story:  Can you spot what doesn't belong in the picture above?  Do you see the piece of "tape" at the bottom of the picture that looks thicker than the rest?  Well, that's because it isn't drywall tape.  It's rug-tape.  Yes, the kind of tape you put on the bottom of rugs so they don't slip around on smooth floors.  Did I know it was rug-tape when I put it on the wall?  No.  Did I realize it was rug-tape when I sanded my joint compound and I could still see it's imprint?  No.  So imagine my surprise when I went around the house a few days later looking for my rug-tape only to find it next to my joint compound.  It hit me in slow motion.  I grabbed the roll of rug-tape, looked at the roll, looked at my wall, looked back at the roll, looked back at the wall... "ah shit".  That's right!  I accidentally used rug-tape on my wall and I didn't even realize it until it was all done.  I don't recommend using anything other than dry-wall tape, but this goes to show that mistakes happen and they can always be fixed.  And by fixed, I mean sand the crap out of it until you don't see it anymore then paint over it.  Voila!

Ok.  Back to the directions...

5.  Apply joint compound.  I used a 4" compound knife to apply my pre-mixed joint compound.


As you can see, the application doesn't have to be perfect because it all gets sanded down.  You can also see the piece of rug tape...but let's pretend it's all smooth and pretty.

6.  Let the joint-compound dry.  I made sure to wait overnight.

7.  Sand with a coarser grit sandpaper.  I used 80 grit.

8.  Apply another layer of joint compound using a larger compound knife.  For the second layer I used a 10" compound knife and made sure to blend my joint compound into areas of the wall that were 3"-4" beyond my actual drywall space.  This helps blend the patched hole in with your existing wall.

9.  Wait for the joint compound to dry.

10.  Sand again.  First, with the 80 grit to even out the surface.  Then, with a 200 grit piece of sandpaper to smooth everything out and to make sure the wall looks seamless.

11.   Paint.


As you can see from the picture above, the wall is pretty much seamless.  I mean, aside from the small area where the rug-tape is slightly raised, you wouldn't even be able to tell that there used to be an opening in the wall.  If you didn't know me, that last sentence was just typed with a little bit of a sarcastic tone...rug-tape, rug-tape, rug-tape...why!?!!?!?!  But, not worries!  If you follow these directions (minus the rug-tape), you'd be able to get a seamless finish too!

Have you made any wonky DIY mistakes like I did?  How did it turn out?


[Share to Pinterest]

Sunday, October 19, 2014

Bring Las Vegas Home!

Vegas.com reached out to me to join their "Bring Las Vegas Home" challenge! Exciting, right?! Funny thing is, I went to Vegas for a 3-day trip this summer and specifically walked through the Cosmopolitan Hotel just to check out their decor. Who knew I would be asked to create a room inspired by the Cosmopolitan Hotel suites only 3 months later?

When I think of the Cosmopolitan, I think of one word..GLAM.  With all of the hotel's ornate chandeliers, bold colors, and unique furniture shapes, everything is so extravagant. I love it!  However, if you have read my blog or seen the before & after pics of my home, you know that my design style isn't exactly contemporary or glamorous in any way.  If I had to categorize my style I would say it is more transitional/ traditional.  So, even though my home looks nothing like the Cosmopolitan, this is how I would bring a little bit of Vegas into my home...


When I look at pictures of the Cosmopolitan suites, there are pops of navy throughout the sleeping and living areas.  I brought this into my room design by choosing accent pieces with different shades of blue.  The dark blue cushions on the crisp-white sheets create a great contrast, while the softer blue chair and throw create a more cozy room, which is more my style.

A room inspired by the Cosmopolitan or Vegas, in general, wouldn't be complete without gold.  I LOVE having gold accents throughout my house and my design for this room would be no different.  The wall sconces and nightstand have gold detailing, which adds a slightly more luxurious feel to what would otherwise have been a standard white and blue room.

I chose tufted furniture pieces with soft, touchable fabric to emulate the decor of the Cosmopolitan.  However, instead of choosing a chair with a more contemporary and funky shape, I wanted to use a more "traditional" chair.  The arm-chair I chose has a high back and great detailing along the sides and bottom, which adds interest to the room without being too drastically different from what I'm used to choosing for myself.

I also chose a cream-colored rug with a more modern, geometric pattern to anchor the room.  The colors in the rug don't clash with any of the furniture pieces I have chosen and the simple, geometric pattern ties in the with geometric shapes of the nightstand.

I love this room!  I can just imagine these pieces in a room with sexy, smokey gray-colored walls and beautiful, velvety charcoal-colored blackout shades.  This room has a touch of cozy and a touch of glam.  Nothing looks too modern or contemporary, but the design isn't entirely traditional either.  So this is my answer to Vegas.com's challenge to #bringLVhome.  Taking from either your own experiences or pictures you have seen of Las Vegas, how would you bring Vegas home?

**UPDATE**
Opps!  I was so excited to design this room I totally forgot to mention the inspiration photos I used on Vegas.com for the Cosmopolitan Hotel.  Check them out at:  Cosmopolitan Hotel.
[Share to Pinterest]

Sunday, September 28, 2014

Rediscovering Benefit: My Favorite Benefit Products


Have you ever fallen in love with a product, stopped using it for awhile, rediscovered it, and fell in love with it all over again? For whatever reason, I find that this happens to me all. the. time.  This time around, I rediscovered a few Benefit products I regularly used in the past and also picked up a new eyeliner that is borderline genius/kind of annoying.

The "rediscovery" usually happens out of chance and sometimes out of curiosity.  This time, I picked a small box of Benefit samples from Sephora as my 500 point-perk.  I wasn't expecting much and I really wasn't too excited because I was familiar with the products in the box, which included lollitint and "they're Real" mascara.  I didn't use the products right away (like I normally would).  Instead, I put them in my travel bag for a weekend getaway because the tubes were tiny and they were the perfect sizes to carry on a plane.  I used the they're Real mascara, they're Real eyeliner, and lollitint cheek/lip stain in HOT Vegas weather and realized they were the best products I had used in a looong time!


The they're Real mascara has an applicator with plastic bristles that are great at separating lashes and add good amount of volume and some length.  Layering Benefit's they're Real mascara on top of Maybelline's Lash Blast is the most perfect mascara combination EVER!!!!!

Maybelline's lash blast gives my stick straight lashes tons of volume and the they're Real mascara helps define and separate my lashes, while making them look thicker.  The result is phenomenal and I highly recommend that you try it!  I honestly don't know why I ever forgot to repurchase the they're Real mascara after I ran out of my last tube, but I'll be sure to repurchase it after running out of this sample.

A few weeks after I purchased the they're Real mascara, my best friend asked me if I tried the corresponding eyeliner.  Say what?! I didn't even know there was a corresponding eyeliner.  I was immediately curious.  I went home and googled it, watched a bunch of reviews on Youtube, then went out and grabbed a stick of they're Real eyeliner to try.

The eyeliner is a gel formula that comes out of the tube when you twist the base.  The formula is long-lasting, water-resistant, and can be makeup remover resistant as well.  I've worn the mascara everyday for the last couple of months and have very rarely seen any transferring to my under-eye area...no raccoon eyes here!  The tip of the eyeliner is also genius because it's slanted.  This makes winging out eyeliner soooo much easier and faster.  You just press the gel against your lid and voila!  You're done son!  Really.  It's that easy.

Now, the only annoying part about this eyeliner is the waste and clumping that happens if you twist the base of the tube one too many times and too much product comes out.  You end up with something that looks like this....

Sorry, please ignore the gross-ness of the tube.  Like I said, I've had this for a few months.  Let's just focus on the tip of the eyeliner, shall we?  You see how all that product has come out at the tip?  That's waste.  That's 2-3 applications that I will have to wipe off the tip.  Why?  Because if I try to use the eyeliner when there is this much product at the tip, I usually end up with clumps of geleyeliner on my lid.  Just look at the swatch picture below for proof...

See that glob of eyeliner in the middle of the picture?  Yeah...it's super annoying when the glob is on your eyelid and you're in a rush to get ready for work in the morning.  Other than being wasteful, the gel itself is perfect.

Another long-wearing product I tried again was their lip/cheek stain.  I used to have the benetint stain, but it didn't work out for me because I didn't know how to blend it in on my face without leaving streaks so I just threw it out.  This time, I tried lollitint.  It's a pinkish-purple colored stain that looks great on the cheeks as well as the lips. Lollitint isn't as bright and dark compared to benetint so blending it in is a lot easier.

Also, instead of applying the stain directly onto my cheeks from the brush, I put a little dab of the stain on my finger, then blend it into my face.  This way, I don't end up with weird streaks or dark spots.  The result is a long-wearing, natural flush that is easy and quick for me to create in the mornings when I'm in a rush to get out the door.

The last product from Benefit that I'm loving again is the Bella Bamba blush.

The blush is a peachy-pink color with fine sparkles.  Layered on top of lollitint, bella bamba gives my cheeks that perfect glow that I love, especially since the weather is slowly getting more and more gloomy.

Bella bamba is lollitint's perfect companion.  I feel like bella bamba accentuates lollitint's pink tones and the combination would look great on any skin tone.

This awkward picture shows what bella bamba, lollitint, and lollitint + bella bamba look like on my skin respectively from top to bottom.

As you can see, the combination swatch is the most vivid.  Believe me, I don't put large streaks of this combination on my cheeks.  I blend these babies in and they create the perfect flush of color!

It's amazing how quickly I forgot about these products and how quickly I fell in love with them again.      I encourage you to try these products anytime you're looking for a new mascara, eyeliner, or blush.  I mean, they have to be pretty awesome for me to write a post this long.  Have you rediscovered any makeup products?


[Share to Pinterest]

Wednesday, September 24, 2014

The Best Mop and Bucket EVER?!

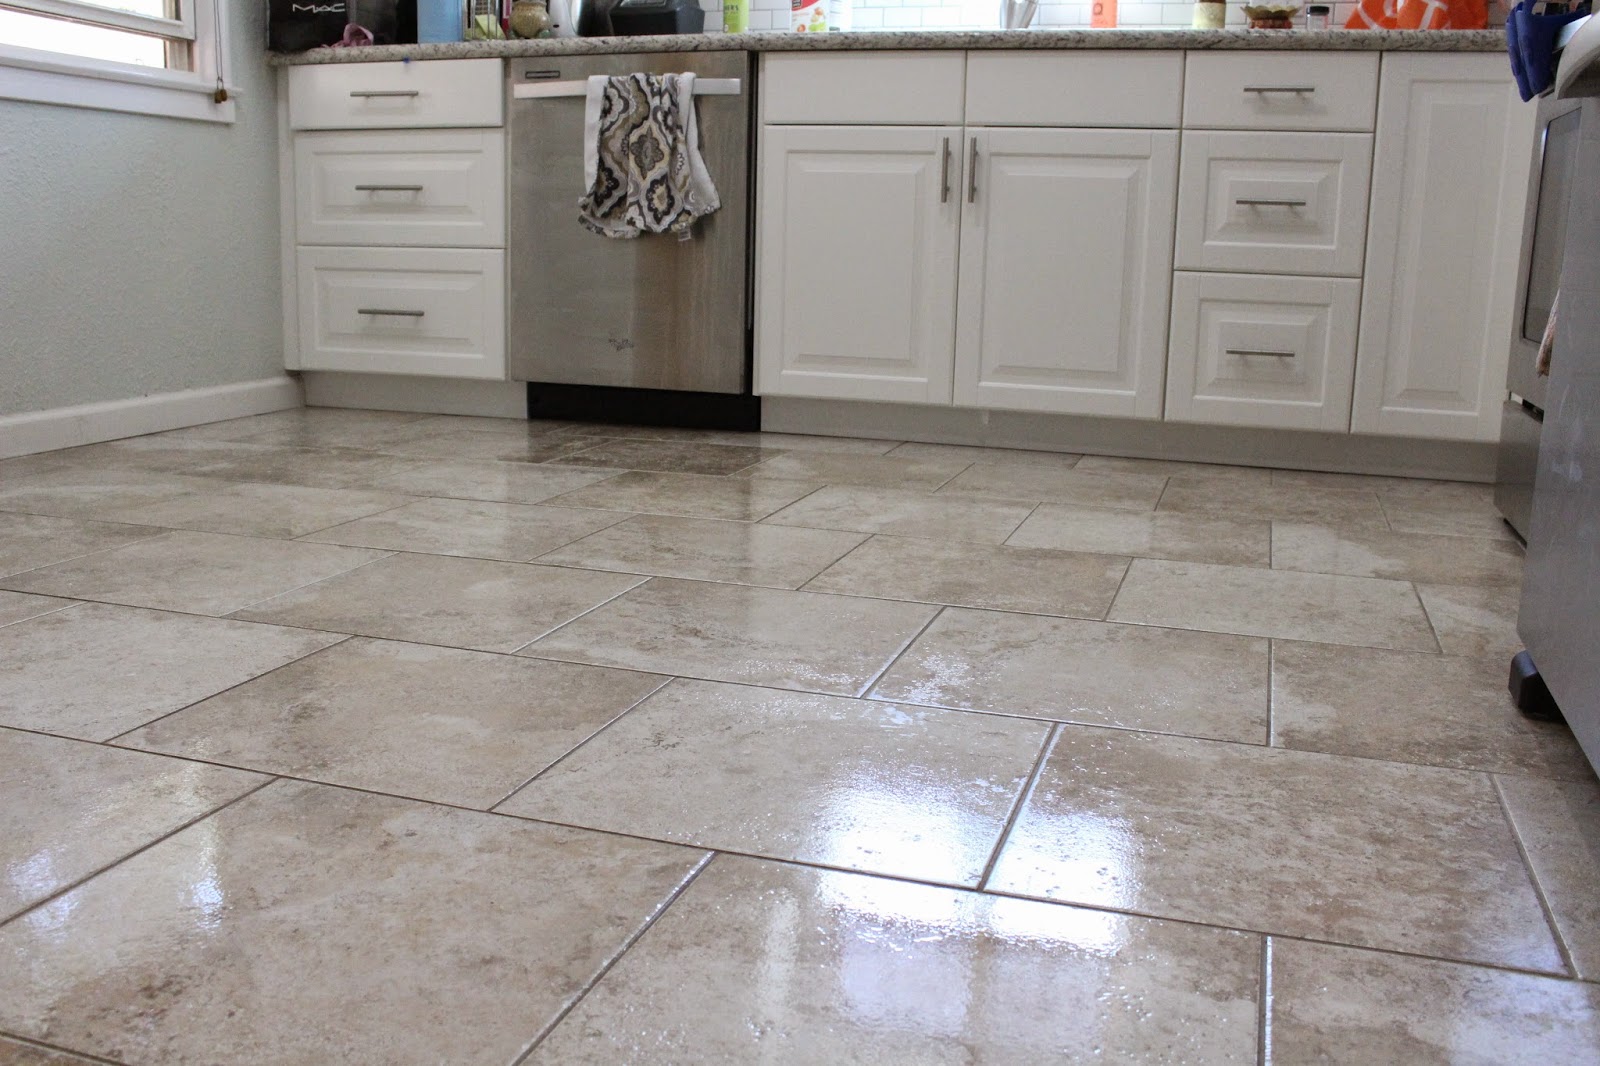
So a couple of posts ago I shared my homemade cleaning recipes with you guys and mentioned a mopping solution I normally make.  Well, today I want to share the mop and bucket I use!

I want to start by prefacing that the O-Cedar Easy Wring Mop and Bucket ($29.99) I got from Walmart was the least expensive option compared to other self-wringing bucket systems I looked at. If you search Amazon for self-wringing buckets, there are a ton of options (I'm pretty sure they all work the same).


This is a self-wringing system because you don't have to use your hands to wring your mop.  You simply step on the pedal at the base of the bucket and the upper portion of the bucket spins so that centripetal force (?) forces water out of your mop!  It's as simple as that!


The bucket also has a "max" sticker to let you know when the bucket is full to ensure your mop isn't absorbing any more cleaning solution while you are wringing it out.


I also love that the mop itself is made up of microfiber material so it does really well with picking up dirt and absorbing messes!  If you want, you can also detach the mop head and pop it into the washer for easy cleaning.


I have been using my bucket and mop weekly for a couple of months and I must say that I love it.  I know you may be asking "why a mop and bucket?" when there are more "modern" ways to clean my floors, but I must say that steam cleaners and the wet cleaning pads have not been very effective for me.  Also, I hate how obnoxiously-scented wet cleaning pads are and I don't like constantly changing the pads for steam cleaners because I feel like they can get so dirty midway through a cleaning session.  With a mop and bucket, I can wring out the gunk and keep on trucking with my cleaning!  A mop and bucket also gives me the versatility of making my own cleaning solutions to meet my floors' needs.

What do you guys think about using a mop and bucket?  Is it too old school?  Do you really feel like those wet cleaning pads work?
[Share to Pinterest]